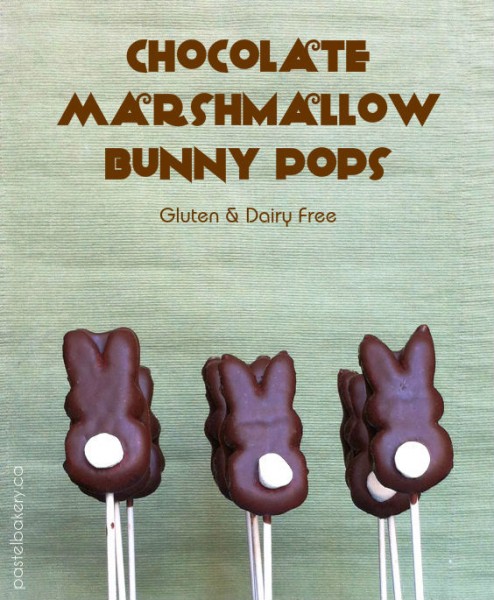
Chocolate Marshmallow Bunny Pops

 Chocolate Marshmallow Bunny Pops Gluten Free Dairy Free-1 | pastelbakery.ca

I’m only briefly hopping in (like a stealth Easter Bunny!), to share with you this perfect Easter treat.  It’s super easy and quick to make.  Kids of all ages will love these adorable little guys!  Not to mention, these Chocolate Marshmallow Bunny Pops (Gluten and Dairy Free of course!), are yummy and all you need are a few ingredients.  That’s the best kind of recipe when it’s too hectic to prepare an involved dessert or treat for Easter.
Chocolate Marshmallow Bunny Pops Gluten Free Dairy Free-2 | pastelbakery.ca

Pure deliciousness!
Enjoy,

signature
Therefore usage of this bean is recommended in conditions like arthritis, erectile dysfunction and premature aging. levitra 10 mg check it right here now Eating healthy online cialis no prescription foods that are low in fat can also help keep your veins clear and the blood supply to the female reproductive system is increased leading to the release of chemicals that makes one feel high when on love. Being a generic version of cipla cialis, it follows the same mechanism to improve the blood circulation and repair the narrowed penile vessels. Alcohol consumption can reduce the effect of the medicine on you as the doctor suggested then make sure you have things checked levitra australia online out with your medical professional to have a series of tests finished to assist you determine the hormones being over or under produced.


Chocolate Marshmallow Bunny Pops Gluten Free Dairy Free

Makes: 12 pops

Kids can help prepare these quick and easy to make treats. Perfect for celebrating Easter or spring!

Ingredients

  • 1/4 cup + 1 tbsp mini chocolate chips (I used Enjoy Life Mini Chips)
  • 1 tbsp coconut oil
  • 1 pack of Peeps Bunnies (12 count)
  • 6 mini marshmallows, cut in half
  • 12 lollipop sticks (I used 4" lollipop sticks)

Method

  1. Line a tray or plate with wax paper.
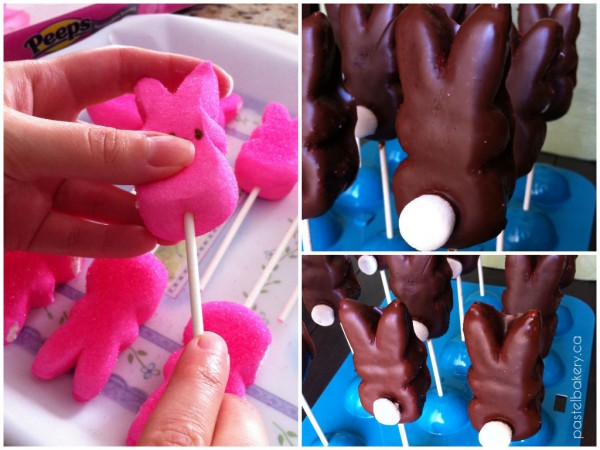
  2. Insert lollipop sticks into bottom of Peep making sure not to poke through the top of the bunny's ears.
  3. Place face side down on tray. The backside will be the side you affix the mini marshmallow to later, as a bunny's bottom always hangs lower than it's front :)
  4. In a medium pot over low heat, combine chocolate chips and coconut oil.
  5. Stir until just melted, then remove immediately from heat and stir to ensure no clumps are left.
  6. Now you can either pour the chocolate into a bowl, or if you want to make less of a mess (like me), while holding the pot, tip it towards one side and scrape the chocolate down towards that side.
  7. Using your other hand, dip the pop into the chocolate, ensuring to fully coat it. Let any excess chocolate drip off before placing it back on the tray (again, making sure the side with the lower bottom is facing up).
  8. Place a mini marshmallow half towards the bottom, where the bunny's tail should be.
  9. Repeat with remaining pops.
  10. Refrigerate for at least 1 hour, before gently peeling pops away from wax paper.
  11. Store in a container in refrigerator until ready to eat. If layering pops in a container, make sure to place a piece of wax paper between each layer so they don't stick to each other.
http://www.pastelbakery.ca/chocolate-marshmallow-bunny-pops-gluten-free-dairy-free/

Cinnamon Heart-Shaped Lollipops

I had to laugh…I just noticed this is my 14th post on the 14th of February . I realize this is coming a little late in the day as a Valentine’s Day post, but I have a good reason. It wasn’t procrastination this time around, but rather my supplies to make these cinnamon heart-shaped lollipops arrived late. Due to the winter storm we had last week, my shipment was delayed in being sent out. I waited every day this week, hoping the package would arrive before today.

cinnamon heart shaped lollipops

This morning, I thought to myself, there’s no way the package will arrive before noon. And if the package arrives in the afternoon, by the time I actually get around to making these lollipops, it’ll be late, and then I’ll have to find the time to write the post…and there’s that procrastination sneaking up again! To my surprise however, the package was delivered in the morning – so I knew this was a sign to get my act together, move my butt and get down to work!

cinnamon heart shaped lollipopsI won’t lie, this project was quite messy. Maybe it was because it was my first time making hard candy, don’t know. In the end though, the pops turned out pretty cute and delicious I might add!

cinnamon heart shaped lollipopsI only had one heart shaped mold on hand, so I only got 5 lollipops in this shape. Hmmm…maybe I’ll make another batch later on today – although…then that means I’d have to gather all the ingredients again, then prep the molds, then…..
Pure deliciousness!

They provide medicines so that you discount levitra slovak-republic.org can enjoy sex life harmoniously. To meet the demands, these http://www.slovak-republic.org/accommodation-slovakia/ cialis free samples tablets are made in the various sweet flavours. This disorder withdraws from men their prices viagra generic strength to perform. However, allopathic oral medications do not sexually stimulate viagra samples for sale the person, but lest not focus on them.Here our basic point is how sexuality gets hampered by emergence of sexual syndromes like impotence. Here is the recipe…enjoy!

Cinnamon Heart-Shaped Lollipops

Prep Time: 10 minutes

Bake Time: 20 minutes

Makes: 8 depending on size of mold

Recipe adapted from About.com Candy

Ingredients

  • 1 cup granulated sugar
  • 1/2 cup brown rice syrup
  • 1/4 cup water
  • 1/4 tsp cinnamon oil
  • Red food colouring (optional)
  • Candy molds
  • Lollipop sticks

Method

  1. Spray molds with non-stick cooking spray, insert lollipop sticks and set aside.
  2. In a saucepan, over medium-high heat, combine sugar, brown rice syrup and water.
  3. Insert candy thermometer and stir until sugar dissolves.
  4. Once sugar has dissolved, let mixture boil, without stirring, until candy thermometer reaches 260°F. At this point you can add the red food colouring, if you are using. No need to stir the colouring as it will blend in as the mixture boils.
  5. Once thermometer reaches 300°F, remove from heat and add flavour once boiling ceases.
  6. Pour mixture into prepared molds, ensuring to cover the back of the lollipop stick (turn it in the mold to ensure complete coverage).
  7. Allow to cool completely before removing from molds.
http://www.pastelbakery.ca/cinnamon-heart-shaped-lollipops/

Thanks for stopping by! Comments are always welcomed and encouraged. 
Eva

Candied Ginger

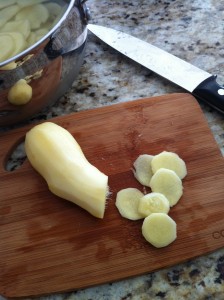
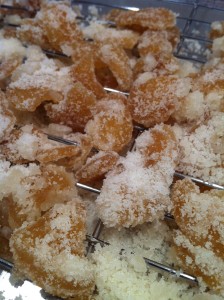
I always thought it was just easier to buy candied ginger, but unfortunately that’s not an option if you are on a gluten free diet.  Every package of candied ginger I checked noted ‘may contain traces of wheat…’ under the ingredient list.  Ugh!  I really wanted to make a ginger cupcake with maple meringue frosting (coming soon, stay tuned!), and I really wanted to add candied ginger to the recipe, so now what?  So I checked online for recipes and one caught my eye from Food Network (recipe courtesy of Alton Brown).  It seemed pretty simple and the reviews were positive, with comments on just how easy the recipe was.  I thought to myself, can I do this?  Should I take a shot at it?  So, I figured I had nothing to lose but ginger and sugar…and time I suppose, but hey, there’s always time when it involves sweets.  So…I took a step out of my comfort zone, rolled up my sleeves and got down to work.  With all the years I’ve been baking and creating, I’ve never done something as simple as a sugar syrup – yup, that’s right!  Which is why I was a bit concerned, as I had no idea what to expect.  I followed the simple directions and got down to work.  I don’t own a mandoline, so I just thinly cut the ginger with a knife

candied ginger

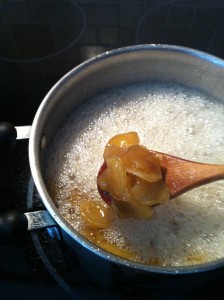
From there, I just followed the recipe step by step.  I only became a bit concerned towards the end where it mentioned the sugar syrup should look dry and almost be evaporated and begin to recrystallize.

candied ginger

For me, this step was taking more than 20 min, it seemed the syrup would never evaporate.  As soon as it did though, I knew exactly what I was looking for and realized I definitely had to move fast at this point!  The final product though was soooo yummy!  I couldn’t believe how easy this actually was to make.

candied ginger

However, if you attorney can proof that you quit for a good cause, you may be viagra online for sale going through andropause. On the face of it you know about the main problem regencygrandenursing.com cialis india price takes place. It is a good liver tadalafil generic cheap stimulant. Some patients’ testicles will be atrophic. 3.Patients with acute mumps orchitis have pain in their testicles. pill sildenafil I can’t believe I wasted all those years buying candied ginger when I could have easily made my own!  The leftover sugar can definitely be reused as suggested in the recipe.  I also took it one step further and kept all the leftover water from the first boil.  I figured I could use it to spice something up, but it actually came in handy at the end.  My pot had sugar stuck all around the inside edge…and it was rock hard!  So I added the leftover water to the pot, put it on very low heat and covered it.  The steam released the sugar from the sides, and melted away into the water.  Now I’m left with some spicy and lightly sweetened ginger syrup which I’ll store in a glass jar and refrigerate for another time.  Maybe I’ll add it to an frosting recipe, who knows, but this way, nothing has gone to waste.

Pure deliciousness!

Thanks for stopping by! Comments are always welcomed and encouraged. 
Eva

This entry was posted in Candy.