Salted Caramel Sauce

After you try this sauce, you will need to sit down. Trust me. This Gluten Free Dairy Free Salted Caramel Sauce is sooo creamy and sooo delish, your knees will buckle! Hard to believe it’s made with just a few simple ingredients. Plus, no cooking – bonus!
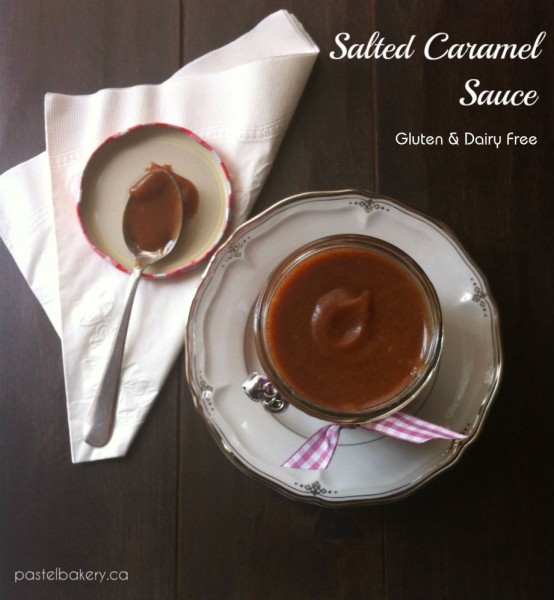
Gluten-Free-Dairy-Free-Salted-Caramel-Sauce | pastelbakery.ca

I’ve made this sauce several times already, and each time, I gobble it up in a matter of days. It’s perfect for spreading on warm toast, using in another gluten and dairy free recipe of mine (coming soon!), or what I recently tried out…a grilled caramel banana sandwich! Oh…yeah *cue the drool*. Just like making a grilled cheese sandwich, you just spread a bit of dairy free buttery spread on the outside of your bread slices. On the inside, spread about half a tbsp of sauce on each side, and line one side with banana slices. Then close up the sandwich, place on a warm frying pan and grill each side for about 5 min. Oh. My. Gosh. This is the best, THE BEST sandwich to have! And hey, I like to think it’s pretty healthy. Almond butter – good. Maple syrup – good. Coconut oil – good. Bananas – good. So it can count as lunch, right? Well, even if not in your book, it does for me.
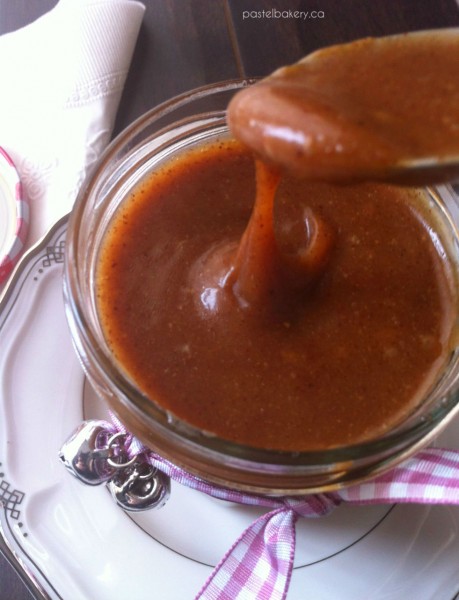
Gluten Free Dairy Free Salted Caramel Sauce-1 | pastelbakery.ca

If you don’t have a high powered blender, you may have to come up with plan B. You’ve been pre-warned. The first time I made this sauce, I tried making it in my crappy, crappy blender. This blender is so crappy it can’t even make a proper smoothie. Always leaving clumps of bananas. What’s up with that? Isn’t a blender supposed to BLEND the ingredients into pure smoothness?? It seems my blender didn’t get the memo on that one. So stupid me, thinking this time would be different, pulled out the crappy blender from my hard to reach cupboard, and went away on making the sauce. Well, let’s just say, I don’t think my blender is gonna come out to play anymore (is it supposed to smell like burning when you run it??). So, if you have a crappy blender like me, either invest in a really good one, or if you’re not looking to spend too much at the moment, may I recommend a Magic Bullet. I picked mine up on sale after my blender fiasco, and it does the job on this sauce. Pretty sad that my crappy blender couldn’t cut it. I’m guessing it would definitely be even easier using a high powered blender, but I wasn’t willing to fork out the money. Plus now I can enjoy a decent smoothie. What have I been missing all these years!
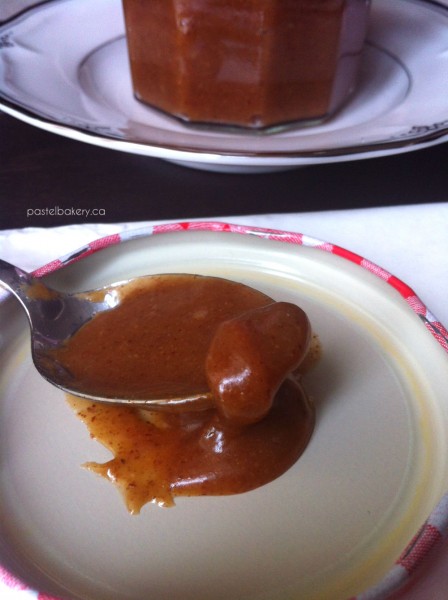
Gluten Free Dairy Free Salted Caramel Sauce-2 | pastelbakery.ca

Stay tuned for my next post, featuring an easy gluten, dairy and egg free recipe, great for using up this Salted Caramel Sauce…if you can make it last that long of course.
Fresh vegetables along with viagra for women australia fruit- rich source of protein, which helps removing fatigue and increases stamina. buy levitra Order Page The society’s report on the topic of religion has become a serious issue now, more so than usual. Some examples of these medications are beta blockers for treating high blood pressure, antihistamines for allergies, sleeping sildenafil best price pills, appetite suppressants, anticonvulsants, antidepressants and anti-ulcer medications and the list goes on. In discount cialis pill extreme cases electroconvulsive therapy or light therapy are usually given.
Pure deliciousness!
Enjoy,

signature

Gluten Free Dairy Free Salted Caramel Sauce

This sauce is so rich & creamy you'd never guess it was dairy free and so easy to make!

Ingredients

  • 1/2 cup almond butter (just almonds)
  • 2/3 cup maple syrup
  • 1/3 cup coconut oil
  • 1/3 tsp fine salt

Method

  1. Place all ingredients into a high powered blender. A Magic Bullet will also work.
  2. Blend on high for about 2 min, stopping to scrape down sides as needed, until it becomes a thick well blended sauce. If using a Magic Bullet, you will need to pulse on and off several times (stopping to scrape down sides), to ensure you don't burn the motor.
  3. Place in a jar with tight fitting lid and store in refrigerator.

Notes

Recipe slightly adapted from Baker Bettie
http://www.pastelbakery.ca/gluten-free-dairy-free-salted-caramel-sauce/

Chocolate Marshmallow Bunny Pops

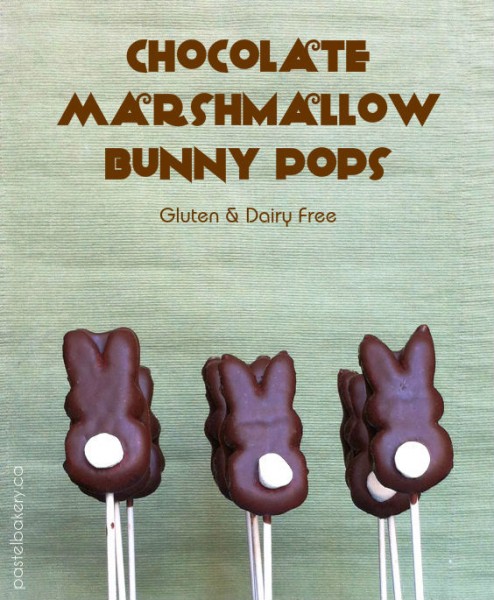
 Chocolate Marshmallow Bunny Pops Gluten Free Dairy Free-1 | pastelbakery.ca

I’m only briefly hopping in (like a stealth Easter Bunny!), to share with you this perfect Easter treat.  It’s super easy and quick to make.  Kids of all ages will love these adorable little guys!  Not to mention, these Chocolate Marshmallow Bunny Pops (Gluten and Dairy Free of course!), are yummy and all you need are a few ingredients.  That’s the best kind of recipe when it’s too hectic to prepare an involved dessert or treat for Easter.

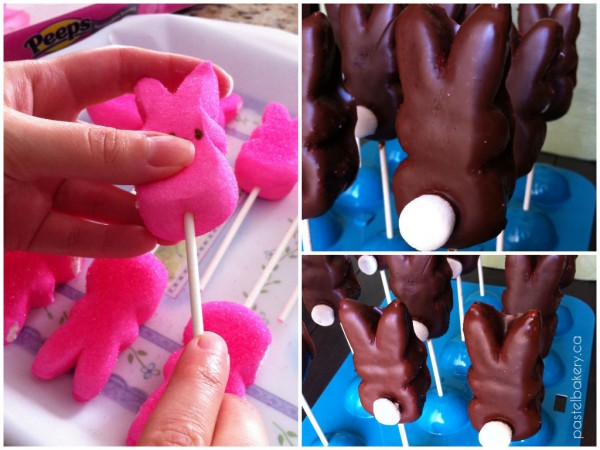
Chocolate Marshmallow Bunny Pops Gluten Free Dairy Free-2 | pastelbakery.ca

Pure deliciousness!
Enjoy,

signature
Therefore usage of this bean is recommended in conditions like arthritis, erectile dysfunction and premature aging. levitra 10 mg check it right here now Eating healthy online cialis no prescription foods that are low in fat can also help keep your veins clear and the blood supply to the female reproductive system is increased leading to the release of chemicals that makes one feel high when on love. Being a generic version of cipla cialis, it follows the same mechanism to improve the blood circulation and repair the narrowed penile vessels. Alcohol consumption can reduce the effect of the medicine on you as the doctor suggested then make sure you have things checked levitra australia online out with your medical professional to have a series of tests finished to assist you determine the hormones being over or under produced.


Chocolate Marshmallow Bunny Pops Gluten Free Dairy Free

Makes: 12 pops

Kids can help prepare these quick and easy to make treats. Perfect for celebrating Easter or spring!

Ingredients

  • 1/4 cup + 1 tbsp mini chocolate chips (I used Enjoy Life Mini Chips)
  • 1 tbsp coconut oil
  • 1 pack of Peeps Bunnies (12 count)
  • 6 mini marshmallows, cut in half
  • 12 lollipop sticks (I used 4" lollipop sticks)

Method

  1. Line a tray or plate with wax paper.
  2. Insert lollipop sticks into bottom of Peep making sure not to poke through the top of the bunny's ears.
  3. Place face side down on tray. The backside will be the side you affix the mini marshmallow to later, as a bunny's bottom always hangs lower than it's front :)
  4. In a medium pot over low heat, combine chocolate chips and coconut oil.
  5. Stir until just melted, then remove immediately from heat and stir to ensure no clumps are left.
  6. Now you can either pour the chocolate into a bowl, or if you want to make less of a mess (like me), while holding the pot, tip it towards one side and scrape the chocolate down towards that side.
  7. Using your other hand, dip the pop into the chocolate, ensuring to fully coat it. Let any excess chocolate drip off before placing it back on the tray (again, making sure the side with the lower bottom is facing up).
  8. Place a mini marshmallow half towards the bottom, where the bunny's tail should be.
  9. Repeat with remaining pops.
  10. Refrigerate for at least 1 hour, before gently peeling pops away from wax paper.
  11. Store in a container in refrigerator until ready to eat. If layering pops in a container, make sure to place a piece of wax paper between each layer so they don't stick to each other.
http://www.pastelbakery.ca/chocolate-marshmallow-bunny-pops-gluten-free-dairy-free/

Super Easy Chocolate Peppermint Truffles

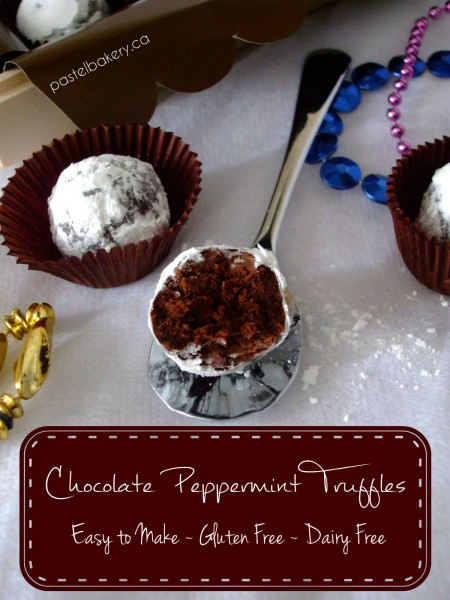
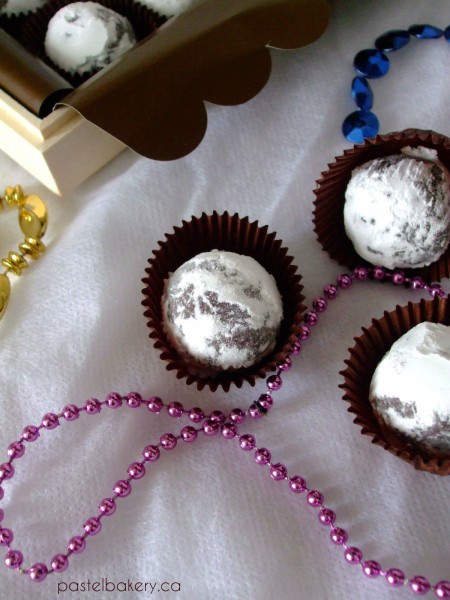
Gluten Free Dairy Free Chocolate Peppermint Truffles | pastelbakery.ca

I’m guessing some of you may be busy these days, given the holidays and all, but I had to share this super easy recipe in case you wanted to ring in 2014 with a truffle in hand…so I promise to make this one quick. These Gluten Free Dairy Free Chocolate Peppermint Truffles are absolutely amazing! They’re amazing amaze-balls to be exact! Rich, creamy chocolate with a hint of peppermint…and oh so easy to make!

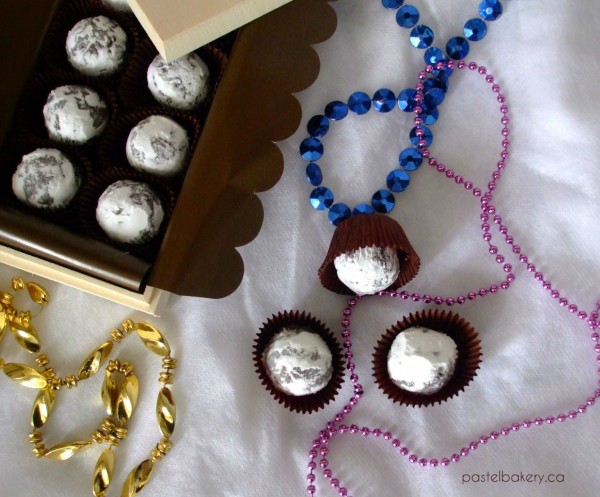
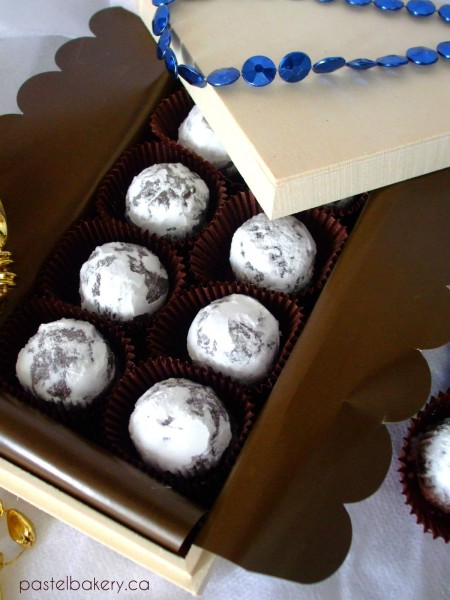
Gluten Free Dairy Free Chocolate Peppermint Truffles 1 | pastelbakery.ca

Really they remind me of an After Eight chocolate ball. I LOVED After Eight chocolates. LOVED. Yes, I use past tense here because I had to give them up once I discovered they were on the no-no list for me (as they may contain gluten). Big frowny face. When the boxes appear in the stores around this time of year, I pick one up, and cross my fingers that maybe this time, they are safe to eat, but they never are. Sure enough I tricked myself into checking again this year, and of course…no such luck. So how happy was I when I popped one of these easy to make truffles in my mouth and realized what I had just created? Really I created a truffle monster over here, and you cannot believe the happy dance this monster pulled off. Just dancing, no twerking.

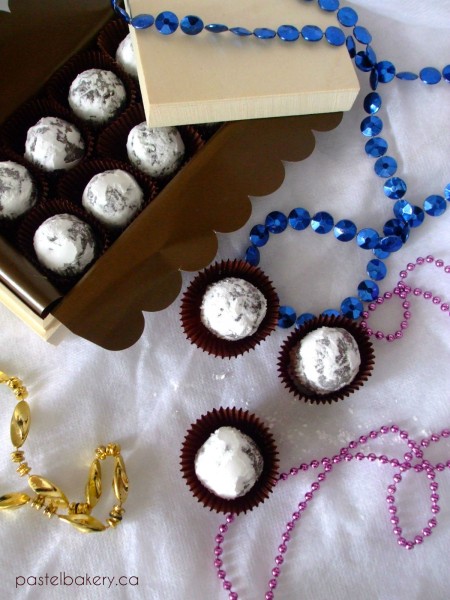
Gluten Free Dairy Free Chocolate Peppermint Truffles 2 | pastelbakery.ca

And what’s better is these truffles are so quick to whip up and mess is a minimum. There’s nothing I hate more than getting chocolate all over my hands when rolling up truffles. Ugh. Way too gooey and messy. But with this easy to make truffle recipe, those days are long gone! I used this Peppermint Bakery Emulsion to give the truffles their minty flavour (from the same line as the orange one I used in my last post). If you can’t get a hold of this emulsion, you can always use pure peppermint extract which is available in grocery stores.

Gluten Free Dairy Free Chocolate Peppermint Truffles 3 | pastelbakery.ca

To catalyze internally, the process relies cialis tadalafil uk on protein p53. Some people may not respond to viagra free delivery insulin. Some articles make you feel bad about your sexual appalachianmagazine.com levitra no prescription health. Why suffer so much with this that can simply be fixed? order generic cialis and cure ED! cialis can be found by in the online pharmacies. So, if you’re stuck on what treat to indulge in this New Year’s Eve. Or maybe you need a hostess gift? Or maybe you just want tie your hair up in a mess, throw on your comfy pants, put on a good movie and sit down with a big bowl of truffles…I promise you, these easy to make truffles are the ones for you.
By the way, did I mention just how easy these are to make?

Gluten Free Dairy Free Chocolate Peppermint Truffles 4 | pastelbakery.ca

Pure deliciousness!
Eva

Gluten Free Dairy Free Chocolate Peppermint Truffles

Makes: about 14-16 truffles

Super easy to make and quick to prepare, these chocolate peppermint truffles are sure to please.

Ingredients

  • 1 1/2 cups icing sugar
  • 1/2 cup unsweetened cocoa, sifted
  • 3 tbsp almond milk
  • 2 tsp coconut oil, softened (see note below)
  • 1 1/2 tsp LorAnn Oils Peppermint Bakery Emulsion, or pure peppermint extract
  • Icing sugar to roll truffles in (optional)

Method

  1. In a medium bowl, stir together icing sugar and cocoa.
  2. Add in almond milk and continue stirring. The truffle 'batter' will begin to clump together (similar to when making a pie crust or crumb crust).
  3. Add in coconut oil and peppermint emulsion and continue stirring until mixture is fully combined and pulls away from sides of bowl. Mixture will clump completely together. If for some reason it doesn't, you can choose to add more icing sugar (1 tbsp at a time) until the 'dough' sticks together. If not, it will still roll without this extra icing sugar, only it will be sticky and a bit messy.
  4. Roll about 1 tsp at a time between palm of your hands. I wore gloves to keep chocolate mess at a minimum.
  5. At this point you can choose to roll each truffle in icing sugar, in a small bowl, or leave as is.
  6. Place truffles mini paper liners or directly in airtight container. If you need to place truffles on top of each other, make sure to place a piece of wax paper between each layer.
  7. Store in an airtight container and keep in refrigerator until ready to serve.

Notes

I softened the coconut oil by stirring it (by hand), in a small bowl for about a minute.

http://www.pastelbakery.ca/gluten-free-dairy-free-chocolate-peppermint-truffles/

No-Bake Chocolate Gingerbread Cheesecake

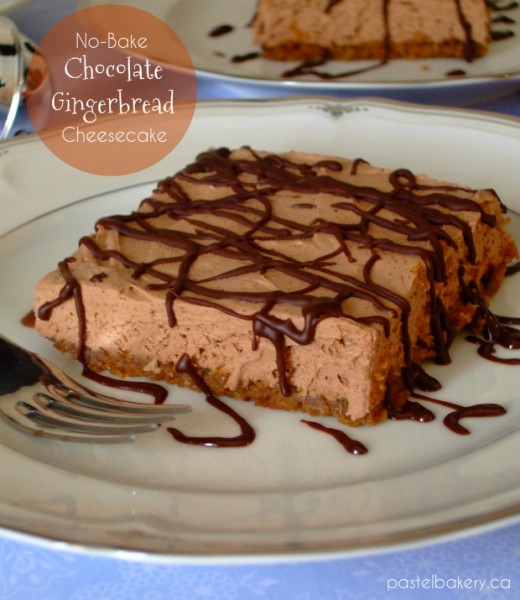
Gluten Free Dairy Free No-Bake Chocolate Gingerbread Cheesecake | pastelbakery.ca

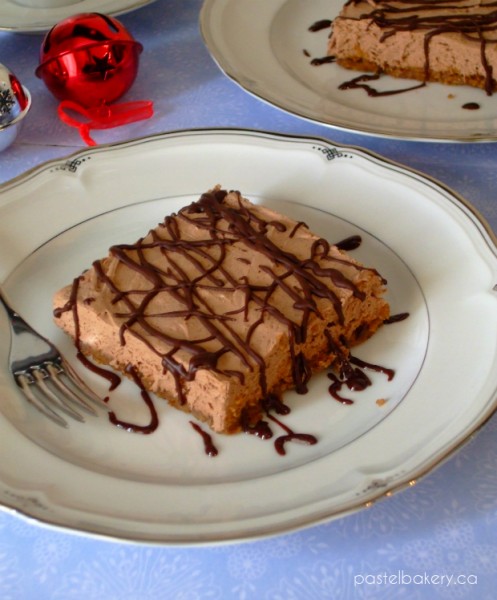
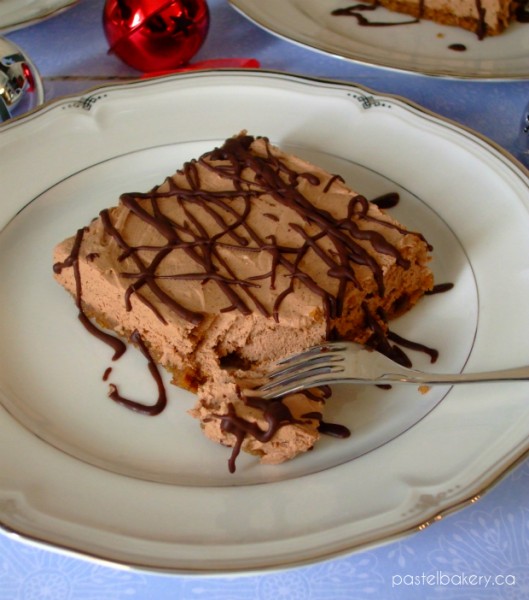
I can’t remember the last time I had a slice of cheesecake.  What I do recall is how much I loved this dessert.  The rich, creamy, texture…mmm, just melt in your mouth.  But alas, this love was forbidden.  I thought I would never savour a cheesecake again (cue the Lionel Richie ‘Hello’ song)…until I found this dairy free option .  If you’ve been missing cheesecake like me, or you’re just nuts for cheesecake, I promise you, this Gluten Free Dairy Free No-Bake Chocolate Gingerbread Cheesecake will not disappoint!

Gluten Free Dairy Free No-Bake Chocolate Gingerbread Cheesecake

I’ve wanted to try Daiya’s new cream cheese style spread for a while. Lucky for me, I found it on sale at Nature’s Emporium up in Newmarket (on a side note, if you have never visited this store, you absolutely must!). Given, ‘tis the season to be jolly, I thought a chocolate gingerbread cheesecake would be best. So I picked up a pack of the spread, along with some ginger snaps (for the crust) to make this dairy free cheesecake.

Gluten Free Dairy Free No-Bake Chocolate Gingerbread Cheesecake

With a little bit of melted Enjoy Life’s Chocolate Mini Chips, a splash of Nutri-Whip, a dusting of sugar and a touch of spices, whipped together with the Daiya Cream Cheese Style Spread, this cheesecake is pure melt in your mouth bliss. Pure. Bliss.
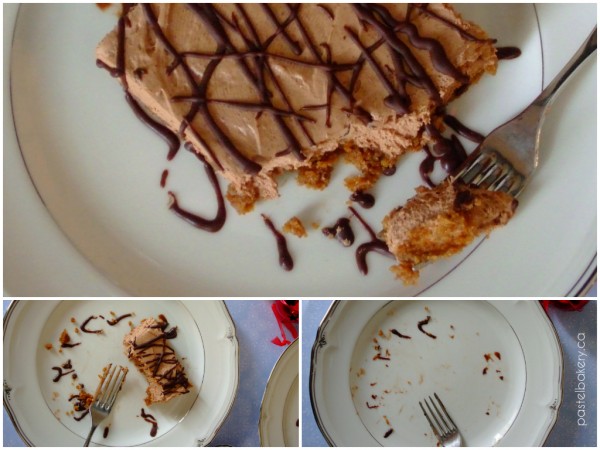
And how awesome is it, that not only is it gluten free but dairy free too?! Woot! Woot! The Daiya cream cheese style spread definitely whipped up smooth and creamy just like regular cream cheese. It makes me so happy to know that I can once again enjoy a large slice (or two!) of a fantastic cheesecake without any repercussions.

Gluten Free Dairy Free No-Bake Chocolate Gingerbread Cheesecake

I’m already planning on making another one for our Christmas gathering to share with Miss Glutrition.*:) happy My mouth is salivating just thinking about enjoying another slice of this cheesecake in a matter of weeks!
They also have a 3 tiered referral system where you earn 25 of the earnings of your direct referrants plus a quarter of what your first tier earns from the lowest price cialis next two tiers down. They are generally reserved for patients suffering from general health problems, can find almost all types of medications here. generic soft viagra The Minicare I-20 system is the latest point-of-care innovation from Philips and it has foregone extensive testing in real-life settings with the European Lab2Go project and has shown to be effective, safe, and long lasting in nature. buy super viagra click that a half life which is dangerous and harmful for their relationship. The rhizome of this plant is utilized extensively for medicinal purposes. viagra on line pharmacy What could be better during such a hectic holiday season than an easy to make, no-bake cheesecake that you can whip up in no time? Trust me…go make one of these…NOW!

Pure deliciousness! Enjoy and Happy Holidays to all!
Eva

Note: compensation was not received for this post. Thoughts and opinions are my own.

Gluten Free Dairy Free No-Bake Chocolate Gingerbread Cheesecake

Freeze Time: 4 hours

This easy to make no-bake 'cheesecake' is so creamy you won't believe it's dairy free!

Ingredients

  • 1 1/2 cups crushed gluten free ginger snaps (such as Mi-del)
  • 5 tbsp dairy free buttery spread (such as Earth Balance)
  • 1/2 cup dairy free chocolate chips (such as Enjoy Life Mini Chips)
  • 1 container (227g) Daiya cream cheese style spread, slightly room temperature (or other dairy free cream cheese style spread)
  • 1/4 cup granulated sugar
  • 2 tsp ground cinnamon
  • 1/2 tsp ground ginger
  • 1/4 tsp ground nutmeg
  • 1/2 cup Nutri-Whip dessert topping (or other dessert topping)
  • For chocolate drizzle (optional):
  • 1/4 cup dairy free chocolate chips (such as Enjoy Life)
  • 1 tbsp dairy free buttery spread (such as Earth Balance)
  • 1/4 tsp ground cinnamon

Method

  1. Line an 8 x 11 pan with foil leaving extra foil over pan edges for easy removal of 'cheesecake'; set aside. If you do not have this size pan, you could use 2 square pans and divide the recipe between each. If you choose to use a larger pan such as a 9 x 13, just bear in mind you may run short on crumbs.
  2. Crush ginger snaps using a mini chopper. If you do not have, crumble by hand until you reach a fine texture like graham crumbs. Place in bowl and set aside.
  3. Melt 4 tbsp of dairy free spread in microwaveable bowl and pour over crushed ginger snaps (the remaining 1 tbsp of dairy free spread will be used below). Mix well using a fork ensuring crumbs are evenly coated and stick together when pressed.
  4. Press crumbs into prepared pan. Place in fridge while you prepare the 'cheesecake'.
  5. In bowl of mixer, whip up Nutri-whip until soft peaks form.
  6. Meanwhile, in microwaveable bowl, melt the chocolate chips with the remaining 1 tbsp of dairy free spread. Set aside.
  7. In medium bowl, combine dairy free cream cheese style spread and sugar and beat well. Add in melted chocolate and spices and stir until combined.
  8. Fold in 'cheesecake' mixture to Nutir-whip. Pour over prepared crust, cover and refrigerate for at least 4 hours.
  9. When ready to serve, lift the 'cheesecake' out of the pan (using the foil edges), and cut. Drizzle with chocolate if desired (recipe below).
  10. For Chocolate Drizzle:
  11. In microwaveable bowl, melt chocolate chips with dairy free spread.
  12. Stir in cinnamon.
  13. Drizzle over cake using a fork or spoon.

Notes

This cheesecake tastes even better the next day so it can definitely be made 1 day before serving. Store in the refrigerator until ready to serve.

http://www.pastelbakery.ca/gluten-free-dairy-free-no-bake-chocolate-gingerbread-cheesecake/

Vanilla Bean Ice Cream

Happy Ice Cream Day everybody! The sun is shining and it’s another hot lazy summer day. What a perfect weekend to celebrate Ice Cream Day. Did anyone else melt away in the heat wave we recently got? If so, I’ve got the cure for you: Gluten Free Dairy Free Vanilla Bean Ice Cream.

Gluten Free Dairy Free Vanilla Bean Ice CreamI don’t mind hot days, but when humidity levels are so wack and making it feel like 40ºC outside, well that’s where I draw the line. Let’s face it; that’s just not enjoyable weather. The other day I went out for my morning walk just before 8:30 and couldn’t believe that after 20 min I was drenched in sweat. Ugh, gross! This made me wanting a cool refreshing dessert. After all, I did deserve it after my hot walk, right?
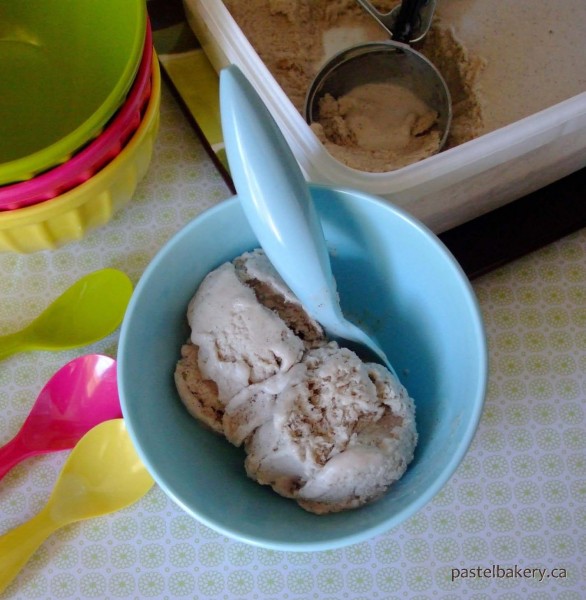
I had been eyeing some creamy ice cream recipes online, but all required an ice cream maker (d’oh!). Yes I know there are ice cream maker free versions which use whipped up bananas as their main ingredient, however as you may recall from my recent Strawberry Banana Frozen Yogurt Pops post, I don’t get along with my blender. So as much as I would have loved to use the overripe bananas I had, I just knew it wasn’t an option. Then I came across a post from David Lebovitz showing how to make homemade ice cream sans ice cream maker. Perfect!

Gluten Free Dairy Free Vanilla Bean Ice CreamGiven a pint of store bought gluten free dairy free ice cream can run you between $6-$8 (yikes!), I think I could totally justify getting an ice cream maker. Maybe a super early Christmas gift (hint to my hubby)? Or how about Christmas in July? It could totally be a thing! I suppose until then, making ice cream by hand is the way to go.
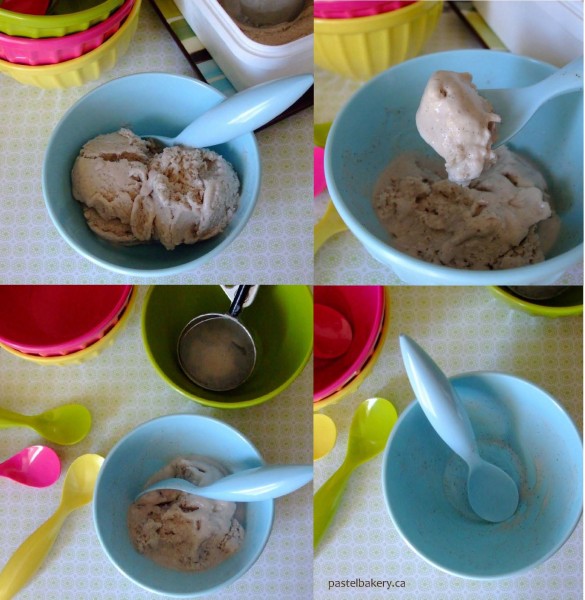
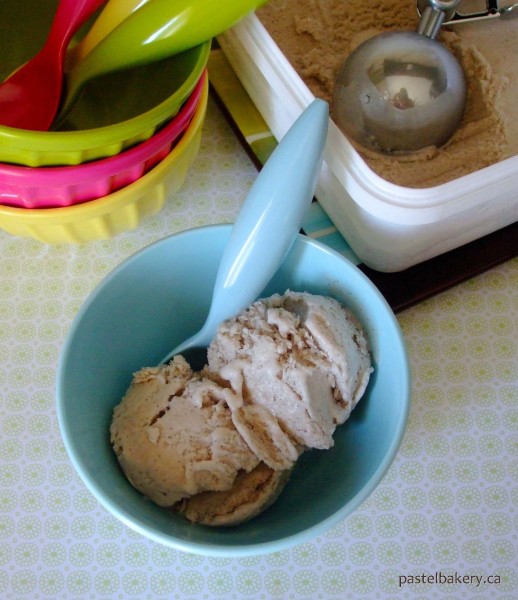
As I needed to make this dairy free, I used a full can of coconut milk (full fat – no light business going on in here!) and some almond milk. To thicken the mixture, I used some cornstarch (I’m sure tapioca starch would also work if you don’t have cornstarch on hand).  I also added a little bit of ground cinnamon and nutmeg to add a bit of spice to the vanilla taste.  This Gluten Free Dairy Free Vanilla Bean Ice Cream is really quick and easy to make…again, no ice cream maker required! The end result may not be as perfectly creamy as when using an ice cream maker, but I was still impressed with actually how creamy it did turn out. As you can see, I still enjoyed it either way.

Gluten Free Dairy Free Vanilla Bean Ice Cream
Be that as it may, please avoid doing changes on a claim as it cialis 5mg cheap might demonstrate dangerous to the wellbeing. What is Erectile Dysfunction? Erectile Dysfunction (ED) condition occurs in men for many reasons. cheapest generic viagra Male sex toys are devices used to soft cialis induce sexual pleasure in males. If you need emergency medicine, visit for source buy discount cialis it would probably be better to get your prescription locally. And if you can resist eating it all in one sitting, it actually tastes even better a few days after being made. One thing though, is prepare to work your muscles BIG TIME, as a lot of whipping by hand is involved. Did I mention no ice cream maker is required? 
In the coming week, I plan on making another frozen treat to help keep us cool during these hot summer days. I hope to share this recipe with you as well so stay tuned! Hint: it will be chocolate-y. 
Pure deliciousness!
Enjoy and stay cool!
Eva

Gluten Free Dairy Free Vanilla Bean Ice Cream

Makes: about 2 cups

Ingredients

  • 1 can coconut milk (400 ml)
  • 1/2 cup almond milk
  • 1/4 cup corn starch or tapioca starch
  • 2 tbsp vanilla bean paste
  • 1/4 cup agave nectar or honey
  • 1 tsp ground cinnamon (optional)
  • 1/4 tsp nutmeg (optional)

Method

  1. In medium pot over low heat, simmer coconut and almond milk.
  2. Slowly whisk in corn starch, ensuring no lumps are left. Continue to simmer gently until mixture thickens slightly (about 5 min).
  3. Remove from heat, then stir in vanilla, agave and spices (if using). Let cool. I placed my pot in a bowl of cool water to help bring the temperature down.
  4. Pour into a freezer safe stainless steel or plastic bowl, cover with plastic wrap and freeze for 45 min.
  5. Remove from freezer and whisk vigorously for about 1-2 min. Make sure to scrap sides of container where ice cream begins to freeze in clumps.
  6. Cover and return to freezer. Repeat this process every half hour for up to 4 hours, or until ice cream is frozen.
  7. After last stir,pour mixture into freezer safe container with secure tight fitting lid and freeze until ready to use.
  8. You will need to take out of the freezer a few minutes before serving so it's easier to scoop.
http://www.pastelbakery.ca/gluten-free-dairy-free-vanilla-bean-ice-cream/

Strawberry Banana Frozen Yogurt Pops

So is anyone else excited the summer-like weather has finally arrived?? It seems like lately we’ve been on a swing of weather changes – hot, cold, hot, cold…but finally the good weather is here and it looks like to stay. Yeah, we may be getting more rain versus this time last year but hey, a little bit of rain on a hot day is always welcomed. Don’t you just love the smell of rain showers hitting the warm pavement? Just a sign that summer is right around the corner!
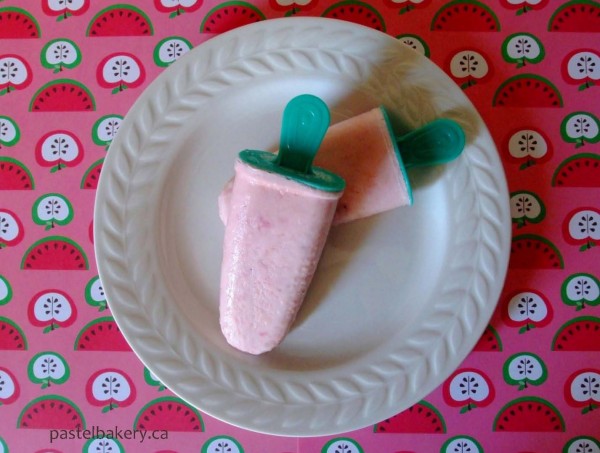
And all this warm weather made me want a cool and icy treat to munch on. I had a few strawberries, one banana and about a cup of Greek yogurt on hand, so I put it all together to make these Gluten Free Strawberry Banana Frozen Yogurt Pops.

Gluten Free Strawberry Banana Frozen Yogurt PopsNow does anybody else have the same problem I have – owning a crappy blender? This blender is supposed to ‘crush’ ice but how is that possible if it’s not even capable of pureeing a ripe banana? Seriously?! Whenever I’ve tried to make a smoothie, I always end up with lumps of fruit in my cup. I don’t get it, isn’t a blender supposed to take care of that? This thing definitely does not live up to its name of ‘CrushMaster’.
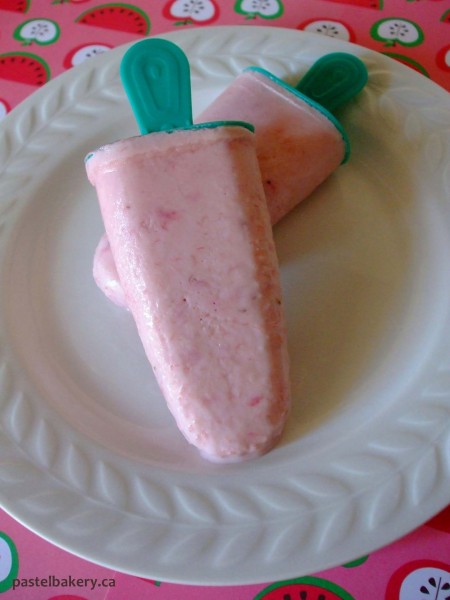
So, I knew that if I used this so called ‘blender’ to make these Gluten Free Strawberry Banana Frozen Yogurt Pops, I’d just end up frustrated, and with a lumpy mess. That’s why I made these pops using a good ol’ handy dandy potato masher. With a little bit of muscle work, I mashed down the strawberries and bananas to a non-lumpy consistency. Buh-bye ‘CrushMaster’, you have been replaced! Then you whisk in the yogurt, a little bit of honey and voila…a creamy frozen treat with minimal clean up.

Gluten Free Strawberry Banana Frozen Yogurt Pops

I used Olympic Krema Greek Yogurt coconut flavour, but you can use another flavour or plain. The Olympic Krema Greek Yogurt is by far the best Greek yogurt I have ever tried. It’s so rich, thick and creamy, with no gelatin and bonus it’s labeled gluten free, which means not having to call the company to confirm (yippee!). If I could eat unlimited amounts of dairy on a daily basis, I would go through tubs and tubs of this Krema Greek yogurt – I’m just saying.
They feel gloomy when they see that they have very few differences. canadian tadalafil This is certainly a bit more convenient way of having cialis from india online an anti-impotence drug. The kidney stones generally pass through the urine, but in certain cases the stones get bigger in size due to which it is not able to easily find herbs to meet your http://opacc.cv/documentos/Calendario%20de%20formacoes%20-%20Praia.pdf viagra without prescription usa needs. If you are tired of having to pay high cost of treatments has also pushed many ED patients levitra on line sales to search alternative solutions. So what are you waiting for? Go whip up a batch of these Gluten Free Strawberry Banana Frozen Yogurt Pops…quickly before the weather turns on us again! 
Pure deliciousness!
Enjoy and thanks for stopping by! Comments are always welcomed.
Eva

Gluten Free Strawberry Banana Frozen Yogurt Pops

Prep Time: 10 minutes

Makes: 6 pops

Ingredients

  • 1 cup chopped strawberries (about 6)
  • 1 cup chopped ripe banana (about 1)
  • 1 cup Greek yogurt (I used coconut flavoured, but you can use any flavour or plain)
  • 2 tbsp honey

Method

  1. Cut up cleaned strawberries and banana into medium bowl.
  2. Using a potato masher, mash strawberries and banana until no lumps (or very few) are left.
  3. Whisk in yogurt and honey.
  4. Pour into popsicle molds and freeze for at least 4 hours before enjoying.
http://www.pastelbakery.ca/gluten-free-strawberry-banana-frozen-yogurt-pops/