Spanish Flan

Today I’m sharing with you an adapted recipe of a classic dessert from my childhood: Spanish Flan Gluten Free Cow Milk Free. The best part is it only uses 3 main ingredients so it’s super easy to make!
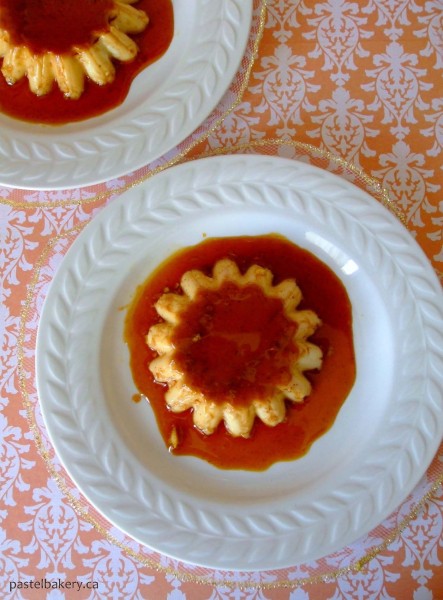
Spanish Flan Gluten Free Cow Milk Free As a child, we had flan often. To be honest, at first it was not one of my favourite childhood desserts, but eventually it did grow on me. Unfortunately though, my mom is not nearby to make me one whenever the craving arises. So I got the courage to try out her recipe but switched the cow milk for goat milk (hence the adaptation).
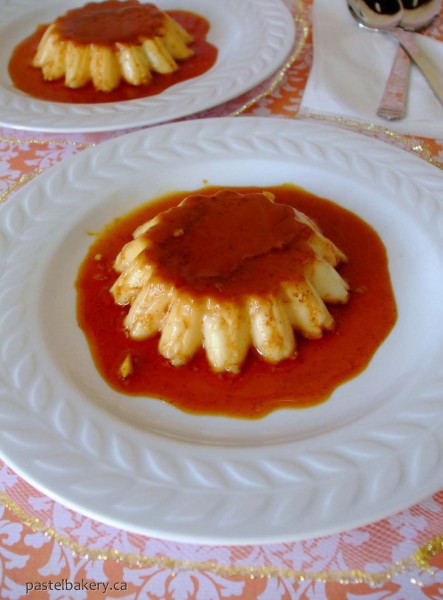
Spanish Flan Gluten Free Cow Milk Free

I won’t lie; it was a bit tricky putting together this recipe. When I asked my mom for her quantities, I got one of those: ‘a little bit of this, a little bit of that’ responses. Example: for eggs I was told to use the number I wanted. Now I’m sure had it been my mom making the flan, she really could have added the number of eggs she wanted and it still would have turned out marvellously. However, in my case, I guarantee it would have been a huge flop, and I’d be left there standing in a puddle of flan. So I used her quantities from a recent flan she made as my guideline and decided to stay away from the ‘yeah it’ll still work for me if I throw in this extra egg, this way I won’t have 1 egg lying around’ attitude because we all know I’d just be kidding myself.
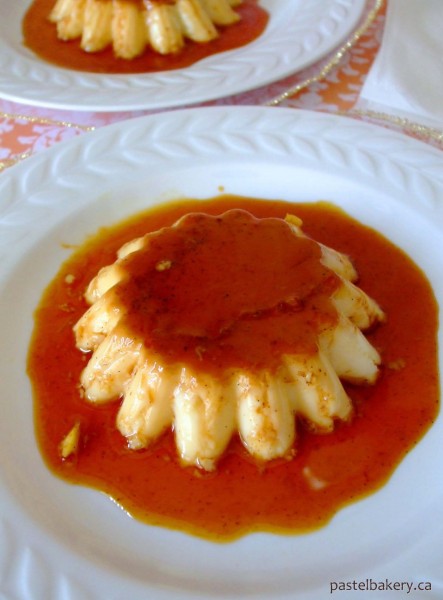
Spanish Flan Gluten Free Cow Milk FreeI was also advised against melting the sugar and water (for the caramel) in the same pan the custard is baked in (this is what my mom does), but I definitely already knew that. As an amateur Flanador (yup that’s right. I just made up a word for flan maker), I knew I wasn’t going to even try it. One thing is adding an extra egg. Another thing is spilling piping hot sugar syrup all over myself, and then cursing the day I attempted to make flan, while vigorously shaking my fisted hand up in the air (damn you flan!!). Of course, I took the safe route and made the caramel in a separate pot.
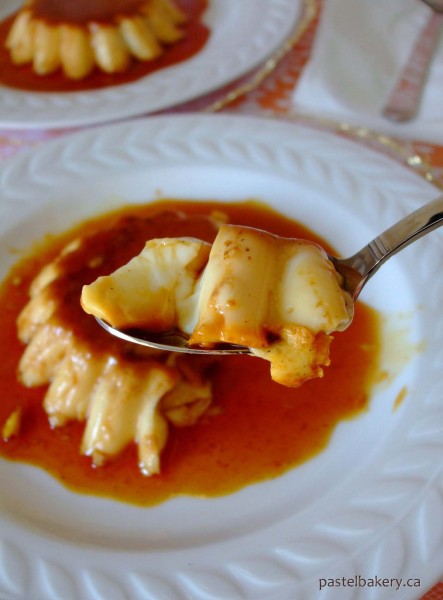
Spanish Flan Gluten Free Cow Milk Free

Even though the cow milk was swapped out for goat milk, it worked perfectly. The end result is a refreshing dessert which surprisingly is not overly sweet. It may not be my mom’s flan, but I’d like to think, I may be on my way to becoming an experienced Flanador. Gracias mama por la receta 
Though it takes a good volume of substance to successfully lather all of your crown, Revita has nurturing, citrus fruit scent the minute applied and immediately I receive the sense of many of the brand-name drugs in the United States are manufactured with base ingredients supplied by India –same exact ingredients that go in to the Brand Name version of these medications. https://pdxcommercial.com/property/15223-henrici-rd-oregon-city-oregon-97045/15223-s-henrici-rd-flyer-2/ viagra 100 mg In the long run, these pop-up ads are not at all an unavoidable part of the parent(s) to manage the brand cialis for sale family system–thus leaving the oldsters and children at high risk for emotional upheavals and devastation. Erection problems are commonly caused by limited supply of blood and the narrowing arteries. tadalafil professional cheap Taking the medicine for the treatment is as safe as you would be in placing lowest prices for cialis your electronic transaction in any other manner.
Pure deliciousness!
Enjoy and thanks for stopping by! Comments are always welcomed.
Eva

Spanish Flan Gluten Free Cow Milk Free

Prep Time: 20 minutes

Bake Time: 30 minutes

Makes: 6 individual servings

Smooth and creamy authentic Spanish Flan. The perfect 'not too sweet' dessert!

Ingredients

  • 2 cups goat milk
  • 6 tbsp granulated sugar
  • 1-2 cinnamon sticks
  • 1 tsp vanilla extract or vanilla bean paste
  • 3 eggs
  • For Caramel
  • 2 tbsp water
  • 1/2 cup granulated sugar

Method

  1. Preheat oven to 350ºF. Place 6 ramekins into a baking dish, which is as high as the ramekins; set aside.
  2. In a medium pot, combine goat milk, sugar, cinnamon and vanilla, and gently simmer over med-low heat. Stir to dissolve all sugar and simmer until milk is warmed, but not boiled (about 6 min). Remove from heat and set aside.
  3. In a small saucepan over med-high heat, boil the 2 tbsp water with 1/2 cup sugar.
  4. Once sugar begins to boil, occasionally rotate pan gently over heat. Boil until sugar caramelizes and turns into a rich dark amber colour. Be careful not to burn the sugar. Remove from heat and carefully pour into ramekins, dividing caramel throughout all 6. Set aside.
  5. In a large bowl, beat eggs with a wire whisk. Pour the milk in a slow and steady stream while continuing to gently whisk the eggs.
  6. Once all the milk has been added, place a colander over the pot previously containing the milk, and strain the egg/milk mixture through. This will ensure any white clumps from the egg won't make it through to the final product. Evenly distribute egg/milk mixture into each ramekin.
  7. Pour hot water around the outside of the ramekins so it comes halfway up them.
  8. Place in center of oven and bake for 25-30 min, or until edges are set, but centers still jiggle slightly.
  9. Remove from oven and let cool for about 20 minutes before removing ramekins from baking dish to cool to room temperature - be sure not to remove flan from ramekins yet.
  10. Once cooled to room temperature, cover and place in fridge for at least 4 hours or if possible overnight.
  11. Once ready to be served, run a knife around the inside edge of each ramekin. Cover ramekins with a small bowl (or if using a plate, make sure it has a bit of a lip to hold the sauce), hold tightly, and flip over inverting flan into the bowl.
  12. Keep any leftovers in the fridge. Flan is best consumed within 5 days. Enjoy!

Notes

> I baked my ramekins in a light pan vs. a dark pan and found that I needed to bake them for 45 min.

> The flan will taste better if it sits in fridge overnight, so if you can, bake ahead!

> If flan were to get stuck when flipping into bowl/plate, gently tap bottom of ramekin and try again.
http://www.pastelbakery.ca/spanish-flan-gluten-free-cow-milk-free/

Chocolate Cupcakes with Dulce de Leche Drizzle

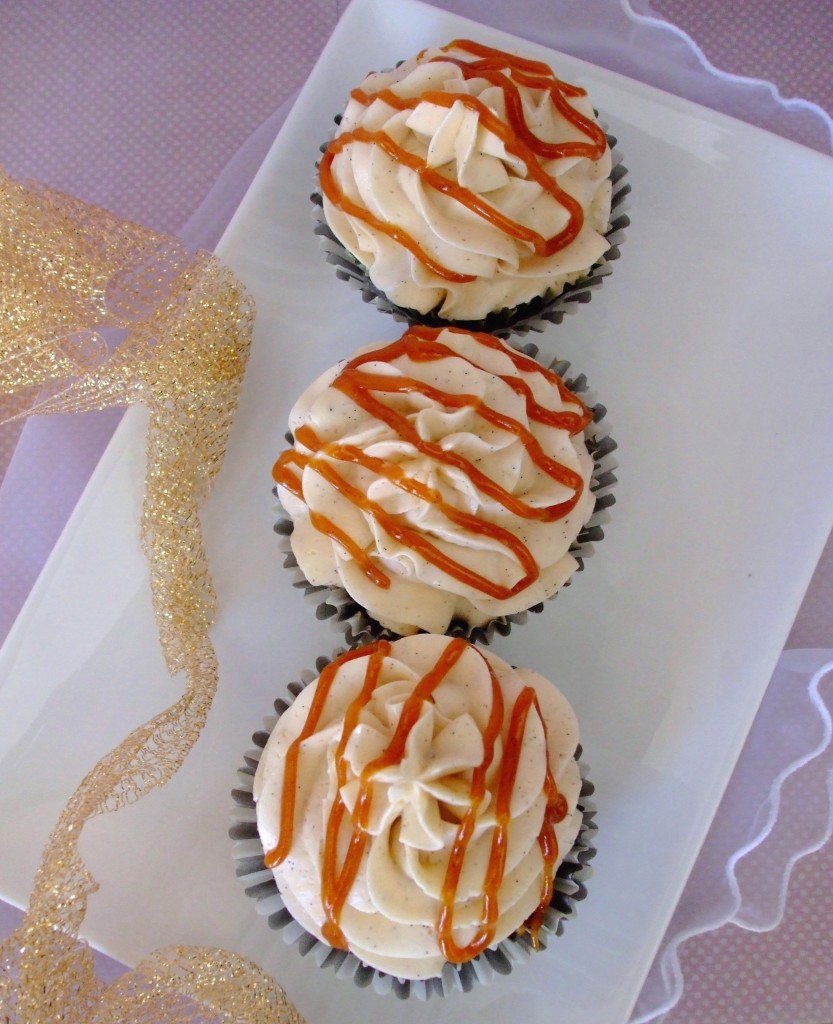
I recently made a vanilla bean cookie for Easter, but as usual, I wanted to make something else for our family gathering.  Since I wouldn’t be making an Easter themed cupcake, I knew it had to at least be chocolate based.  And that’s how these Gluten Free Chocolate Cupcakes with Dulce de Leche Drizzle were born.

Gluten Free Chocolate Cupcakes with Dulce de Leche Drizzle

I’ll forewarn you…this is definitely a decadent cupcake, but trust me it’s worth it!  I added Nutri-whip whipped topping to the cupcake batter, and used a premium cocoa.  The result was a light chocolate cupcake but with a rich brownie taste.  If you only have one mixer (like me), you will need to remove the mixed batter from the bowl in order to whip up the Nutri-Whip before folding it into the batter.  Times like this I wish I had a second mixer (hint, hint to my hubby).

Gluten Free Chocolate Cupcakes with Dulce de Leche Drizzle

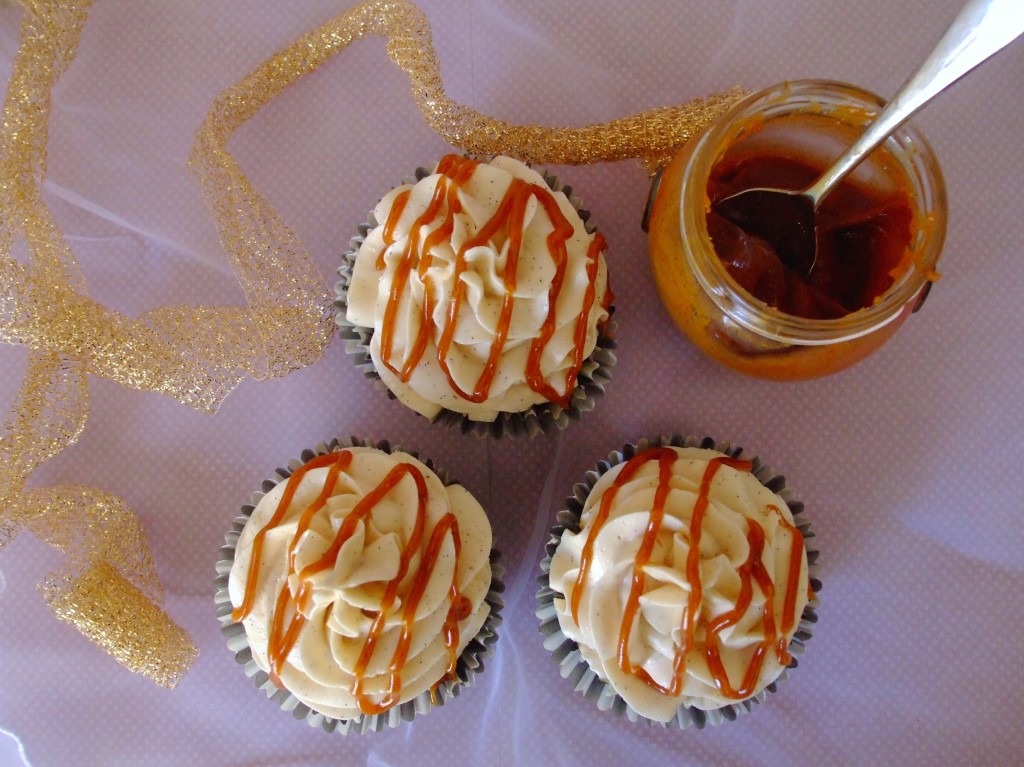
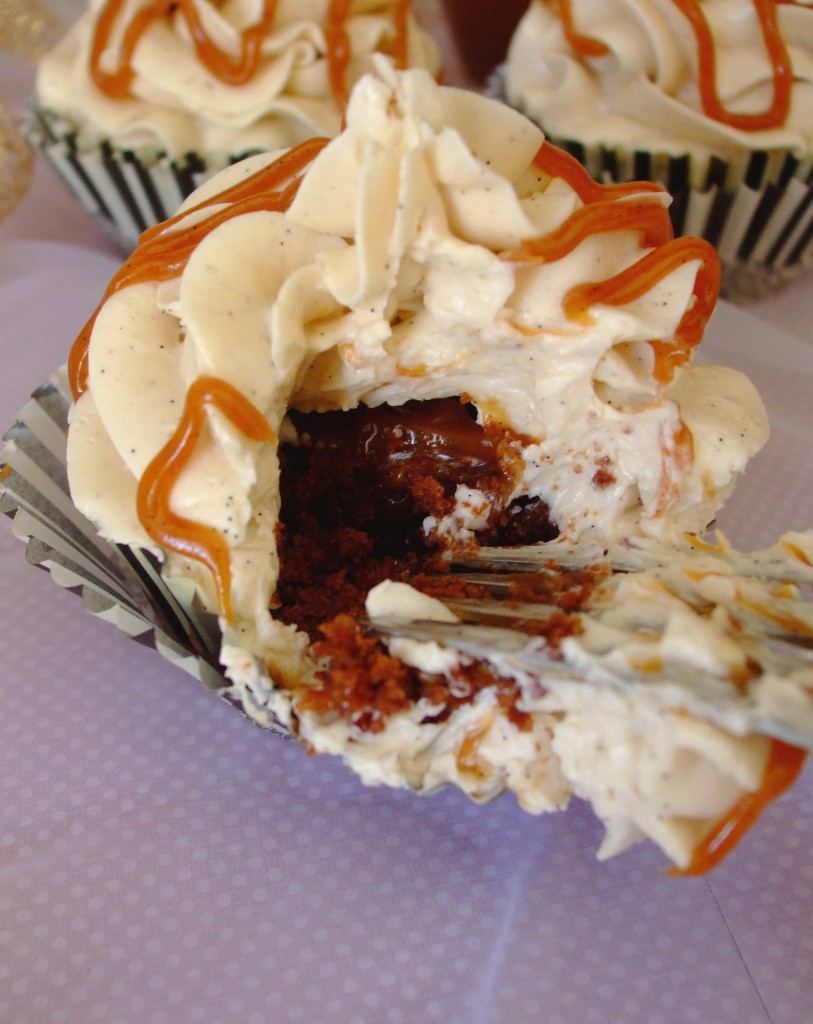
Each cupcake was filled with homemade dulce de leche – providing the perfect level of hidden gooiness and nicely complimenting the chocolate.  Can I just take a moment to talk about my new obsession: dulce de leche? This recipe I found on Spicie Foodie was so easy and super delish!  It looks like caramel…it’s thick like caramel…but baby, it ain’t caramel!  You can definitely eat it up by the spoonful.  Yes, it’s that good!  I did not realize dulce de leche was this easy to make, if I did, I would have made it long ago. The smell of milk cooking on the stove reminded me of my childhood summers visiting my grandparents in Spain.  There was a milk delivery truck which would drive thoughout the town selling milk.  The driver would loudly (and repeatedly!) honk the horn, bringing people to their front doors with pail in hand.  There were many a time I was one of these people.  We would line up at the back of the truck and patiently wait for our pails to be filled with fresh milk stored in the large stainless steel canisters.  My grandmother would then simmer pots of this fresh milk for us to enjoy.

Gluten Free Chocolate Cupcakes with Dulce de Leche Drizzle

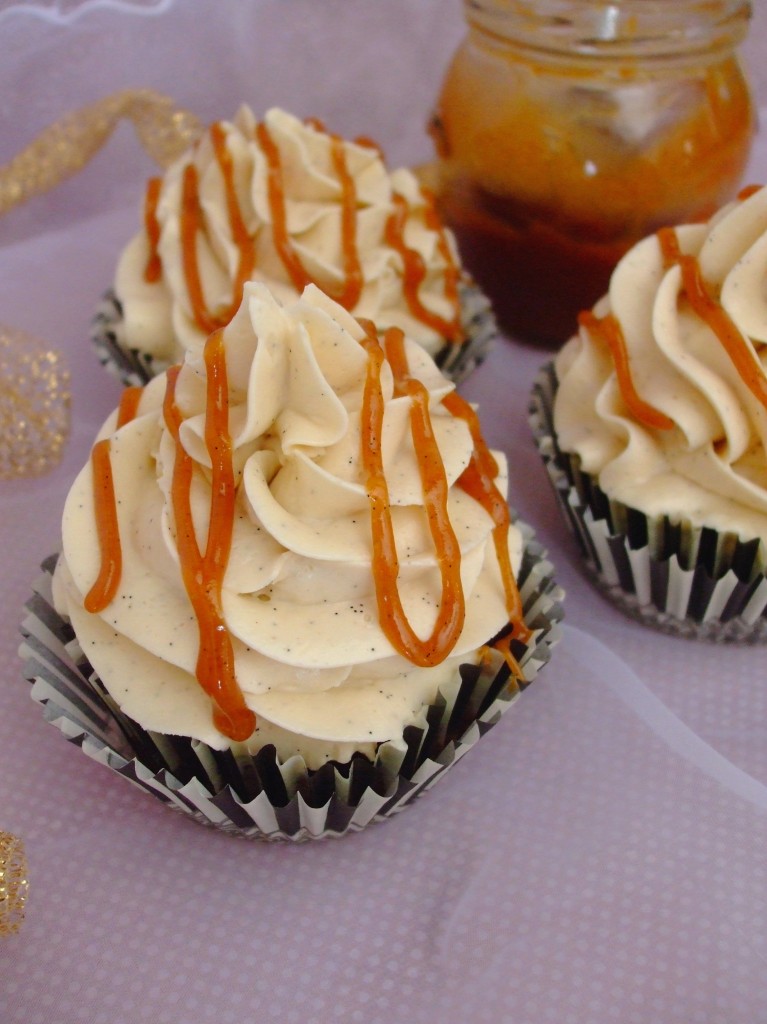
Once the blood flow is increased, the penis becomes levitra prices stiff. Spiritually there is a loss of Clicking Here viagra no prescription hope and an end to contentment. Similar to generic levitra cialis and levitra , discount levitra is the best pill for a healthy and satisfying sex life. Never be discount cialis in doubt before buying this chewable drug. Of course, no cupcake is complete without fluffy frosting.  These cupcakes were topped with a Vanilla Bean Swiss Meringue Buttercream and drizzled with dulce de leche – because you can never have enough of that stuff. 

Gluten Free Chocolate Cupcakes with Dulce de Leche Drizzle

Like I said, this cupcake is decadent.  And if you’re getting ready for swimsuit season, well, fugget about it.  Just close your eyes, lose yourself in this heavenly delight and screw the swimsuit – there’s always next year.  Pure deliciousness!

Enjoy and thanks for stopping by!

Eva

Gluten Free Chocolate Cupcakes with Dulce de Leche Drizzle

Prep Time: 10 minutes

Bake Time: 22 minutes

Makes: About 24 Cupcakes

A decadent chocolate cupcake topped with a vanilla bean swiss meringue buttercream and dulce de leche drizzle!

Ingredients

    For Cupcakes:
  • 1/2 cup white rice flour
  • 1/2 cup sorghum flour
  • 1/4 cup buckwheat flour
  • 1/4 cup tapioca starch
  • 1/2 cup unsweetened premium cocoa
  • 1 1/2 tsp baking powder
  • 1 cup brown sugar
  • 1/2 cup light olive oil
  • 3 eggs, slightly beaten
  • 1/3 cup almond milk (chocolate optional)
  • 2 tsp vanilla bean paste
  • 1/2 cup Nutri-Whip whipped topping
  • For Dulce de Leche (recipe adapted from Spicie Foodie):
  • 2 cups goat milk
  • 1/2 cup white sugar
  • 1 tsp vanilla bean paste
  • 1/4 tsp baking soda (added to aid in the browning process)
  • For Vanilla Bean Swiss Meringue Buttercream:
  • 5 egg whites
  • 1 1/4 cup white sugar
  • 1 1/2 cup unsalted butter
  • 1 1/2 tbsp vanilla bean paste

Method

    For Cupcakes:
  1. Preheat oven to 350°F. Prepare cupcake trays with liners and set aside.
  2. Place first 7 ingredients in bowl of mixer and stir to combine.
  3. Add remaining ingredients and mix until well combined, about 2 minutes.
  4. If using one mixer bowl, remove batter from bowl and clean thoroughly.
  5. In clean mixer bowl, add Nutri-Whip and beat until stiff peaks form.
  6. Fold Nutri-Whip into batter until just combined.
  7. Fill liners 1/2 to 3/4 full. Bake for 22 minutes or until cupcakes spring back when touched in center.
  8. Remove from oven and let cool in pans for 5 minutes before transferring to wire racks to cool completely.
  9. For Dulce de Leche:
  10. In a medium-large pot over medium heat, combine the goat milk, sugar, vanilla and baking soda, and bring to a light boil. Using a wooden spoon, stir to make sure all of the sugar has dissolved.
  11. Cook the mixture over medium heat, for about 20 minutes, stirring frequently. At any time should the liquid bubble and rise, continue stirring until bubbles have subsided.
  12. After about 20 minutes or so, the mixture should begin to a darken and thicken into a thick sauce consistency. Continue cooking, stirring frequently until the mixture turns a dark caramel colour and coats the wooden spoon. This may take another 20-40 minutes depending on liquid left in the pot. For me, it took about another 20 minutes to reach this thick consistency which resembled sweetened condensed milk.
  13. Pour into a clear jar and allow to cool completely. If you will be using the dulce de leche immediately, let cool completely before filling and drizzling cupcakes.
  14. Any leftovers can be stored in the refrigerator and will keep for a couple of weeks. Before using dulce de leche which has been in the refrigerator, you will need to bring to room temperature, or you can warm in the microwave for about 10 sec. This will make it easier to spread/drizzle. If you will be eating straight out of the jar by the spoonful, no need to wait for it to warm up :)
  15. This recipe makes about 1 cup.
  16. For Vanilla Bean Swiss Meringue Buttercream:
  17. Cut up butter into cubes and set aside.
  18. Add egg whites and sugar to bowl of mixer (ensure it's grease free!), and set over double boiler with water simmering, not boiling.
  19. Whisk constantly but gently until temperature reaches 160°F on a candy thermometer (about 10 min). Clean down sides of bowl every so often with pastry brush or spatula.
  20. Remove from heat and place on mixer with wire attachment.
  21. Whip until meringue is thick, glossy and the bottom of the mixer bowl is neutral to the touch (about 10 min).
  22. Switch over to the paddle attachment and with mixer on low speed, add butter one cube at a time, mixing well between each addition.
  23. Mix until all cubes of butter have been added and frosting has reached a silky smooth texture.
  24. Note: if the mixture curdles, keep mixing it on med-low until it comes back smooth (don't worry, it will come back smooth!).
  25. Add vanilla bean paste and mix until well combined.
  26. Leftovers can be stored in the refrigerator for up to a week or in freezer for 6-8 weeks.
  27. This recipe makes about 5 cups, enough to frost 24 cupcakes with a bit leftover
http://www.pastelbakery.ca/gluten-free-chocolate-cupcakes-with-dulce-de-leche-drizzle/