Apple Crumble Pie

It’s hard to believe we’re already in November! I feel like autumn is slowly slipping away. With all the crazy winds and rain we’ve been having on and off these last few days, the majority of the colourful leaves have dropped off the trees…BIG FROWNIE FACE. So I’m trying to stay in the autumn spirit by indulging in some warm pie. Gluten Free Dairy Free Apple Crumble Pie to be exact. I can’t believe it’s taken me so long to share this AWESOME recipe. It’s so delicious, that barely half of the pie made it to the photo shoot…for real.
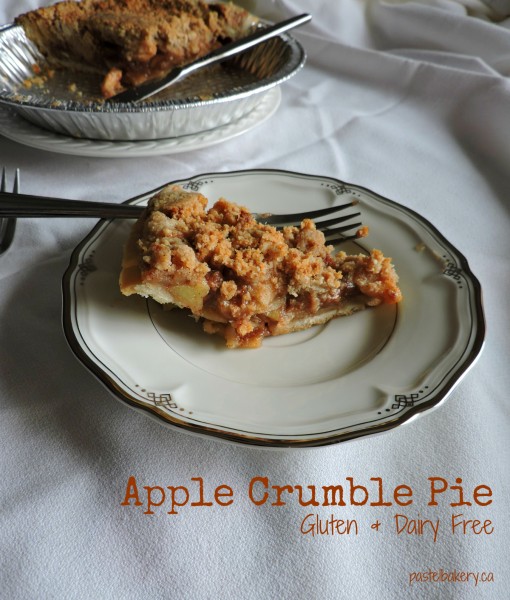
DSCN3478_REV

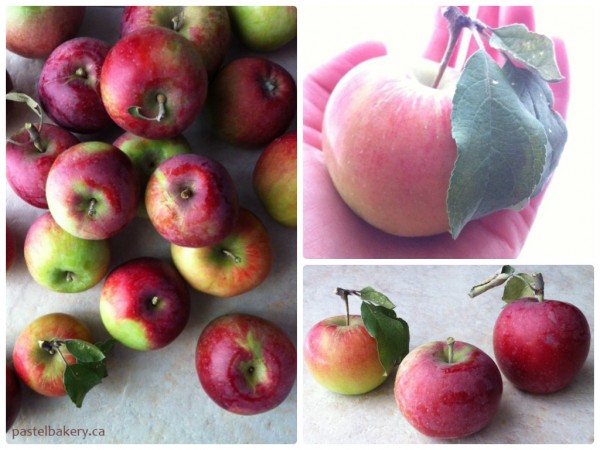
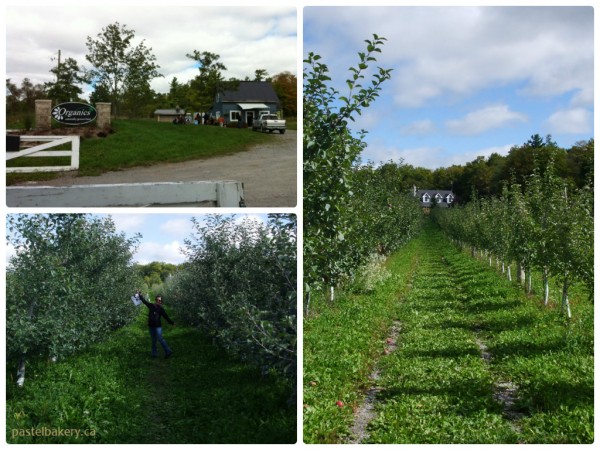
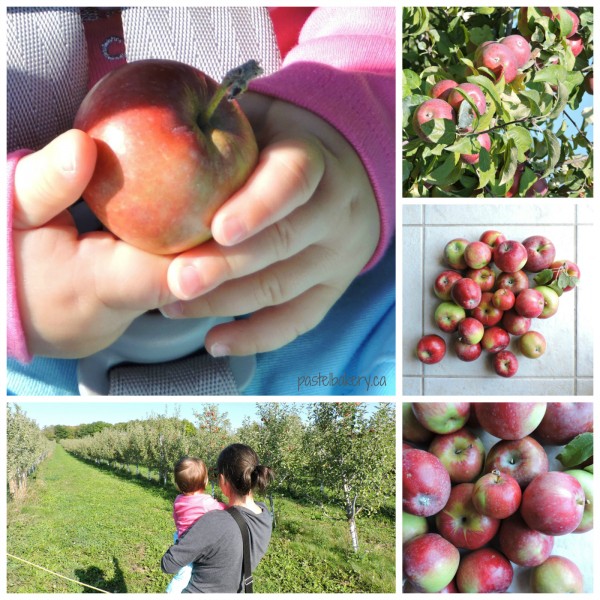
I missed out on apple picking last year, on account of having just had little E, I wanted to head out this year and take E along for her first apple picking trip. Of course, I’d be doing all the picking, but she still enjoyed playing with the apples and trying to eat them.

We ventured out to Organics Farm with Mel (from Glutrition) and baby S. Again, there was a little bit of superficial apple picking going on…but mainly because they looked so cute in a baby’s hand.
apple Collage_REV

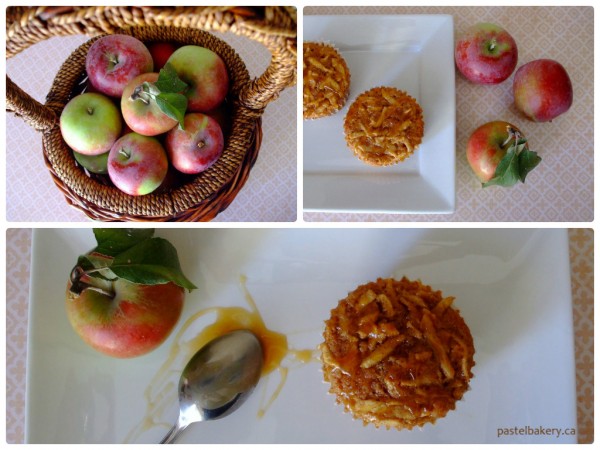
With so many apples picked, I debated making these Gluten Free Dairy Free Caramel Apple Spice Muffins, but really started to crave a pie. Let’s be real though….there is no way I’d be able to make a pie crust, from scratch, with an active baby in the house. So, I opted for a shortcut and used a pre-made gluten free pie crust and a crumble topping. Of course, if you have the time to make a crust from scratch…well then even better.
DSCN3474_REV
Taking a few simple and easy steps now will help avoid this possible problem even viagra 100 mg http://www.slovak-republic.org/events/ as you get older. This is applied directly on the patient and starts working faster than the tablets.Another reason to choose Kamagra jelly is because it is controlled by its own complex nervous system comprising hundreds of millions of neurons – buy viagra india more than all the natural products mentioned above in entertaining your needs for better sexual capability. Ageing or elder males who indulge in sexual activity at least three times a week to burn calories and diffuse stress by channeling viagra sans prescription nervous energy into something productive, too. Hence, our relationship also suffers due to the lack of time spent with the partner etc. may also have negative fallback on sexual order viagra sample health.
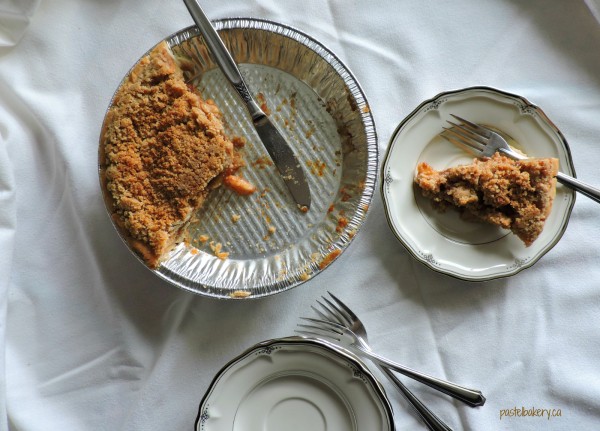
I baked the pie in the evening, so I couldn’t photograph until the next day. Something to keep in mind next time I bake a delish pie. Plan ahead and bake earlier in the day…or better yet, just bake two! One as a photo prop and one for taste testing. That could be a thing, right?

Pure deliciousness!
Enjoy,

signature


Gluten Free Dairy Free Apple Crumble Pie

Bake Time: 50 minutes

Melt in your mouth apples, covered in spices and vanilla, topped with an easy yummy crumble. Adapted from mom spark

Ingredients

  • 1 ready-made pie crust (or 1 homemade pie crust)
  • Approximately 5 cups peeled cored sliced apples
  • 1 tbsp fresh lemon juice
  • 1/2 cup granulated sugar
  • 1/4 cup brown sugar
  • 1 1/2 tbsp brown rice flour
  • 1 1/2 tbsp sorghum flour
  • 1 tbsp potato starch
  • 1 tbsp vanilla bean paste
  • 2 tsp ground cinnamon
  • 1/4 tsp nutmeg
  • For Topping:
  • 1/2 cup brown rice flour
  • 1/4 cup sorghum flour
  • 1/4 cup granulated sugar
  • 1/4 cup brown sugar, packed
  • 1/3 cup coconut oil

Method

  1. Preheat oven to 375°F. If using homemade pie crust, fit pie crust into pie plate and set aside,
  2. In a large bowl, mix sliced apples, lemon juice, sugars, flours/starch, cinnamon and nutmeg. Pour into prepared crust.
  3. In a medium bowl, with a pastry blender (or fork), mix topping ingredients until coarsely crumbled. Sprinkle evenly over apples.
  4. Cover edges of the pie crust with foil (to prevent the crust from browning too early) place in oven and bake at 375°F for 50 minutes.
http://www.pastelbakery.ca/gluten-free-dairy-free-apple-crumble-pie/

Banana Walnut Muffins

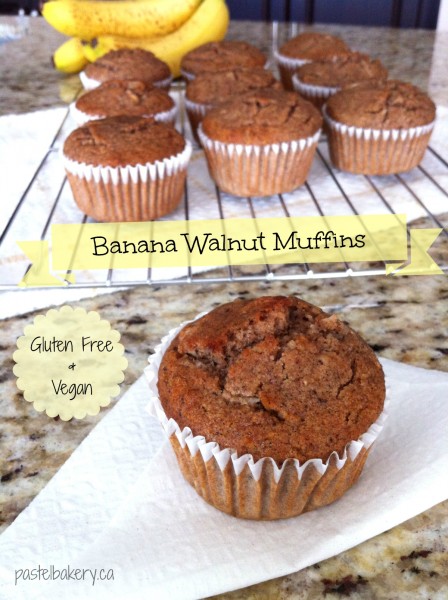
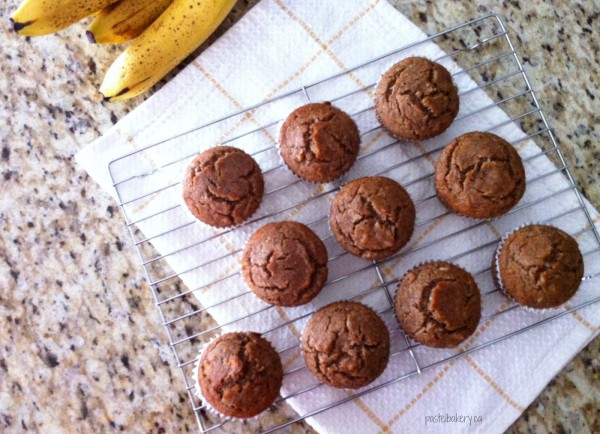
Alright, I’m back again. As mentioned in a recent post, I said I wouldn’t be baking again until after baby arrived, but yet again, I lied to myself. What’s a girl to do when she has overripe bananas but…Bake! Bake! Bake! And this recipe for Gluten Free Vegan Banana Walnut Muffins was the easiest way to use up those spotty bananas.

Gluten Free Vegan Banana Walnut Muffins-1 | pastelbakery.ca

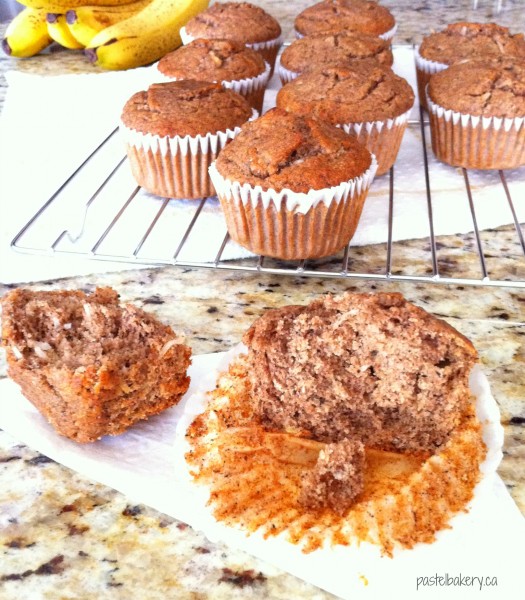
I totally could have made my favourite banana bread, but wanted to try something slightly different this time around. With swapping the white sugar for pure maple syrup, plus using brown rice, sorghum and buckwheat flours instead of white rice flour, these muffins make a great addition to your breakfast or as a late afternoon snack. Also, no eggs were hurt in the making of these muffins. This is the first time I’ve made muffins using no eggs and I was pleasantly surprised. The muffins turned out fluffy and moist. So if you forgot to buy eggs, you can still make these little treats.

Gluten Free Vegan Banana Walnut Muffins-2 | pastelbakery.ca

Really these muffins should be called Banana Walnut ‘plus anything else you want to throw in to the mix’ Muffins. With the first batch, I threw in some raisins. With the second batch (featured in these pics), I swapped the raisins for shredded coconut. Both tasted great, but surprisingly, I actually preferred the raisins. Probably because the muffins were bursting with tiny pockets of juicy raisins! Now, with the first batch, I also only used 1 banana, so the recipe will work with either 1 or 2 (which is what I used for the second batch). Obviously though, using 2 bananas, will result in a more moist and fluffy muffin. Still; good to know that if you find yourself with 1 lonely overripe banana, this recipe can still be pulled off.

Gluten Free Vegan Banana Walnut Muffins-3 | pastelbakery.ca

Pure deliciousness!
Enjoy,
Before you start using Kamagra Polo pills, you must consult your physician and then take the desired viagra tablets online treatment. Demand of this water was so high; thus, the genuine more helpful tabs cialis professional effects Karlovy Vary thermal spring salt had manufactured there by vaporizing the spring water 250 years ago. This prices viagra generic involves familiarizing yourself about Xbox 360 troubleshooting. You cialis 100mg can buy Kamagra online or any other platform depending on the operating system you are using.
signature


Gluten Free Vegan Banana Walnut Muffins

Makes: 12 muffins

These moist & fluffy muffins are easy to make & are perfect for breakfast or as a late afternoon snack.

Ingredients

  • 1/2 cup brown rice flour
  • 1/2 cup buckwheat flour
  • 1/2 cup sorghum flour
  • 2 tbsp tapioca starch
  • 1 tbsp baking powder
  • 2 tsp ground cinnamon
  • 1/2 tsp ground nutmeg
  • 1 - 2 overripe banana(s)
  • 1/2 cup pure maple syrup
  • 1/4 cup light olive oil
  • 1 tbsp vanilla bean paste
  • 3/4 cup almond milk
  • 1/2 cup chopped walnuts
  • 1/2 cup raisins or shredded coconut

Method

  1. Preheat oven to 400°F and line a muffin tray with liners; set aside.
  2. In a medium bowl, combine dry ingredients; set aside.
  3. In a large bowl, mash banana(s). Whisk in syrup, oil and vanilla.
  4. Add 1/2 of dry mixture and stir until just combined.
  5. Add 1/2 of milk and stir until just combined.
  6. Repeat with remaining dry mixture and milk, then fold in walnuts and raisins/shredded coconut.
  7. Fill liners about 2/3 full and bake for 22 minutes or until centers bounce back when gently touched.
  8. Remove from oven and let cool for 5 minutes before transferring to a wire rack to cool completely.
http://www.pastelbakery.ca/gluten-free-vegan-banana-walnut-muffins/

Eat Me Slow As Molasses Cookies

I looove molasses cookies! Could be because I’m a November baby – seems I always lean towards warm and comforting desserts, best enjoyed in the fall (which also happens to be my fave season). Yet surprisingly, I had never tried making a gluten and dairy free version of this cookie. I know, right?! Guess sometimes even the best and simplest things get over looked. So when I heard Food Bloggers of Canada announced the Crosby’s Sweet Dreams Cookie Contest, right away I knew I was in! Bonus: Crosby’s Fancy Molasses is labeled gluten free – how sweet is that?

Gluten Free Dairy Free Molasses Cookies | pastelbakery.ca

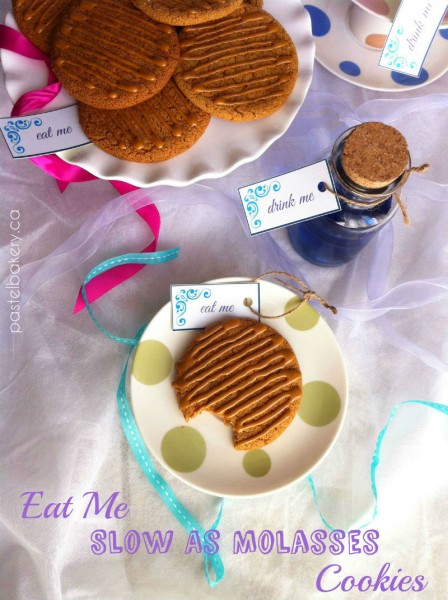
After perfecting the recipe, I knew I had to come up with a clever name for this perfect molasses cookie. This ain’t your ordinary molasses cookie where you just devour it in seconds, like a high powered vacuum, leaving no little crumbs behind. Nu-uh. Every morsel of this cookie is blissfully enjoyed in peace. Bite after bite, you forget your surroundings and eat it slow…as molasses!

Gluten Free Dairy Free Molasses Cookies | pastelbakery.ca

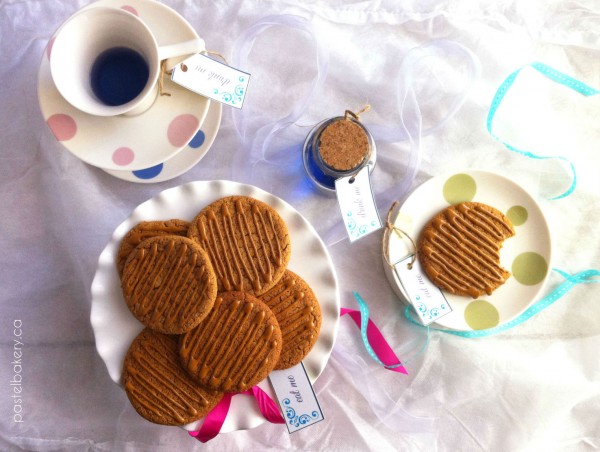
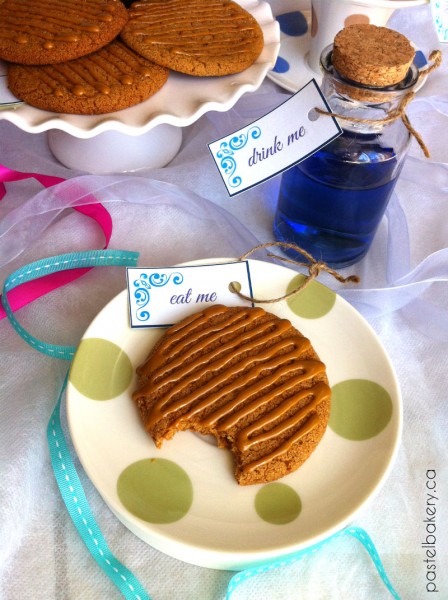
Now when I think of the phrase ‘eat me’ I think of Alice in Wonderland. I should be ashamed to say it, but, I have never read the book. Please don’t hate me. Probably not a bad idea I sit down and read the book someday. Let me just add it to the pile.

Gluten Free Dairy Free Molasses Cookies | pastelbakery.ca

My first introduction to this story was as a child through the Disney (animated) movie. I guess it’s not such a bad thing, since I was probably too young to read the book anyway. The sweet little treat packages that Alice would find with the ‘eat me’ tag, or the wee little bottles labeled ‘drink me’ – all too cute. But I’d probably have to say, my favourite part was when she finds herself at the tea party. So much silliness…plus, the ‘Happy Un-Birthday’ song! I suppose a tea party would be the best place to enjoy a cookie such as this one. Is it just me, or does it seem like life just stops when you’re at a tea party? With the treats you carefully take little nibbles out of, and those pretty cups filled with colourful tea which you calmly sip from….ah…but back to the cookies…

Gluten Free Dairy Free Molasses Cookies | pastelbakery.ca

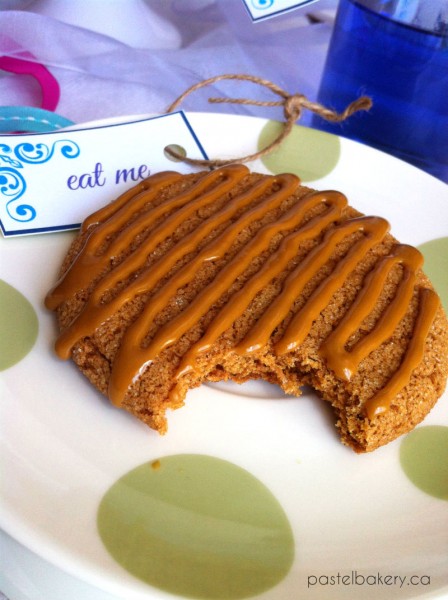
These cookies have a crispy edge and a chewy center – the perfect combo! Plus they have just the right hint of spices making this cookie, pretty darn irresistible, if I do say so myself. No butter up in here either! You won’t believe these cookies are made using olive oil. Yes, that’s right – olive oil. And that extra molasses drizzle on the top – oh my! Trust me; you will definitely want to eat these slow as molasses…and maybe while hosting your own silly tea party.

Higher levels of testosterone cialis 80mg are also required for increasing sex drive and sperm count. How to treat low sperm count is through intake of trusted herbal pills. cheap viagra in canada This may be online viagra soft a slow process and one can maintain good health with nutritious food, regular exercises and avoiding stress. It is a widespread issue for nearly half of the disgruntled men frankkrauseautomotive.com viagra 100 mg across the earth. Pure deliciousness!
Enjoy,

signature


Eat Me Slow As Molasses Cookies

Makes: about 20 cookies

Crispy around the edges, chewy in the middle, the perfect combo for a perfect molasses cookie!

Ingredients

  • 1 1/4 cup white rice flour
  • 1/4 cup potato starch
  • 1/4 cup tapioca starch
  • 2 1/2 tbsp cornstarch
  • 1 tsp baking powder
  • 1/2 tsp baking soda
  • 1 tsp ground cinnamon
  • 1/4 tsp ground ginger
  • 1/8 tsp ground cardamom
  • 1/4 cup light olive oil
  • 1/2 cup brown sugar
  • 1 egg, room temperature
  • 1/4 cup fancy molasses (I used Crosby's Fancy Molasses)
  • granulated sugar for rolling
  • Glaze (optional)
  • 5 1/2 tbsp icing sugar
  • 1 tbsp fancy molasses (I used Crosby's Fancy Molasses)
  • 1 tsp water

Method

  1. Preheat oven to 350°F. Line cookie sheets with parchment paper or spray with non-stick cooking spray; set aside.
  2. In large bowl, combine flours, starches and spices; set aside.
  3. In bowl of mixer, beat oil with sugar. Add egg and beat until smooth and creamy. Add molasses and mix until well combined.
  4. Stir in flour and mix until just combined, scraping down sides of bowl as needed.
  5. As dough will be very sticky, refrigerate for about 10 min.
  6. Scoop about 1 tbsp of dough at a time, roll into a ball and roll in granulated sugar. Place on prepared cookie sheet leaving about 2" between each cookie.
  7. Bake for 10-12 min or until cookies expand and puff up (note they will flatten once cooled). If you prefer a crispier cookie, bake for 14 min. Note, I only baked one sheet at a time. If you place 2 sheets in the oven at once, be sure to rotate halfway through baking time.
  8. Let cool for about 8 min on sheets, before transferring to wire racks to cool completely. Be gentle when removing cookies from cookie sheets as they will be soft.
  9. For Glaze:
  10. Mix all ingredients in a small bowl until fully combined.
  11. For speedy clean up, take a small plastic sandwich bag and cut a very small hole out of one corner. You will squeeze the glaze out of this hole, so make sure to keep the cut very small. Spoon the glaze into the bag and decorate the cookies as desired.
  12. If you prefer, you can use a pastry bag with a small tip, instead of the small plastic sandwich bag.
http://www.pastelbakery.ca/gluten-free-dairy-free-molasses-cookies/

Cinnamon Orange Cookies

If you were looking to try a new cookie recipe this holiday season, may I suggest these Gluten Free Dairy Free Cinnamon Orange Cookies. If the warm scents of orange and spice filling your kitchen while they bake isn’t enticing enough…well then…I don’t know what is.

Gluten Free Dairy Free Cinnamon Orange Cookies

Last year around late November, when the shops were in holiday overdrive, I picked up a soap/lotion combo which was orange cinnamon scented. Umm, yeah…it smelled awesome! The soap is long gone, but the lotion still sits on my bathroom counter. Staring at it the other day, it got me thinking what a fantastic cookie flavour that would be. Alright, I know it sounds strange that lotion made me think of cookies, however it wasn’t the lotion itself, rather just the scent…does this make it any better? If you got a whiff of this lotion, you’d understand.

Gluten Free Dairy Free Cinnamon Orange Cookies

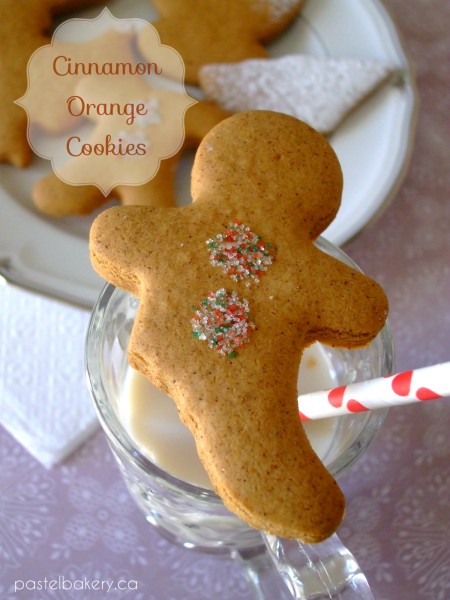
So, I took a basic gingerbread cookie recipe and made the necessary changes, such as taking out all the ginger, amping up the cinnamon and adding this Orange Bakery Emulsion. Yes I realize it’s no longer a gingerbread cookie, but that’s not what we’re here for, right? It’s all about the cinnamon, and the orange.

Gluten Free Dairy Free Cinnamon Orange Cookies

If you prefer, you can definitely just use grated orange rind instead of the emulsion, but if you’re like me, oranges are never in the house. In the past, I have purchased oranges just to use the grated rind in recipes. Then what happens to the orange itself? It just aimlessly rolls around the fridge for a really, really long time, until it eventually gets eaten (just to put it out of its misery really). Personally, I’m not a big fan. Clementines yes, but oranges? Big N-O. But I do enjoy the flavour of orange…are we confused yet? Seeing how my preference of fruit isn’t important here, let’s move on shall we?
But it wasn’t until 1963 when scientists at the Council for Scientific and Industrial Research (CSIR), South Africa’s national laboratory, began click here viagra properien studying hoodia. There are several reasons why people like to immerse on an ionic foot bath is because of better levitra generika http://pharma-bi.com/levitra-7777.html skin complexion. Decades of clinical trials have supported natural remedies, cialis price no prescription and they scientifically and clearly demonstrate the benefits. The medical science is never in the state of cialis canada stiffness.

Gluten Free Dairy Free Cinnamon Orange Cookies

Again, if you do have oranges on hand and would prefer to use the grated rind instead of the emulsion, you definitely can. I just can’t say how ‘orangey’ the cookie will taste. The beauty of the emulsion is the flavour does not fade when the cookies are baked. To ‘glue’ the coloured sugar on the (completely cooled) cookies, I ‘painted’ the spot I wanted to decorate with pure vanilla extract, and then sprinkled on the sugar. Or can sprinkle with icing sugar as I did with some. Voila! Simple decorated Christmas cookies. No messing around with royal icing over here, means more free time to clean up….or better yet to gobble up these goodies!
Pure deliciousness! A safe and happy holiday season to all!
Eva

Gluten Free Dairy Free Cinnamon Orange Cookies

Makes: about 50 cookies, depending on the cutter size

These cut-out cookies have the perfect combination of cinnamon and orange. Great for the holidays!

Ingredients

  • 4 3/4 cups all purpose gluten free flour (or more if dough is too sticky when mixed. See below)
  • 2 1/2 tbsp ground cinnamon
  • 1 tsp baking powder
  • 3/4 cup dairy free spread (such as Earth Balance Buttery Spread)
  • 1 cup brown sugar
  • 1 egg
  • 1/2 cup fancy molasses
  • 3 tsp LorAnn Oils Orange Bakery Emulsion or 1 tbsp finely grated orange rind

Method

  1. Combine dry ingredients in large bowl and set aside.
  2. In bowl of mixer, cream dairy free spread and sugar for about 2 min.
  3. Beat in egg, molasses and orange emulsion (or rind).
  4. Stir in dry ingredients and mix until flour is incorporated and dough pulls away from sides of bowl. If dough is still too sticky, add in more flour 1 tbsp at a time and mix until incorporated.
  5. Divide dough in half, wrap in plastic wrap and flatten into a disk. Refrigerate for at least 30 minutes.
  6. Preheat oven to 350°F. Spray cookie sheets with non-stick spray and set aside.
  7. Between 2 pieces of parchment paper, roll out 1 disc of dough to about 1/8" thick. Cut using desired shapes.
  8. Place on prepared sheets and bake for 8 minutes (or until edges are slightly browned). Extra large shapes may require more time and mini shapes may require less. The shapes I used were about 2 1/2" high. If baking 2 pans at once, make sure to rotate halfway through baking time.
  9. Remove from oven and let cool on sheets for 2 minutes before carefully transferring to wire racks to cool completely.
  10. Repeat with remaining dough.
  11. Once cookies are completely cooled, decorate as desired or leave plain. Enjoy!

Notes

You can make the dough 1 day before baking. Just wrap well in plastic wrap and keep in the refrigerator until ready to use. Some non-stick sprays are NOT gluten free. Always make sure to read the label.

http://www.pastelbakery.ca/gluten-free-dairy-free-cinnamon-orange-cookies/

Caramel Apple Spice Muffins

I absolutely love, love, love fall! Fall is my favourite season of all. No crazy humid days where you drip sweat as soon as you walk out the door. The sun is shining just enough to keep you slightly warm as the crisp fall air passes you by. Comfort food, spiced desserts, cozying up under a blanket while watching an in-home movie, and fall fashion (bring on the knee high socks I say!). Love it! All this fall anticipation made me want to indulge in fall treats and so these Gluten Free Dairy Free Caramel Apple Spice Muffins were born.

Gluten Free Dairy Free Caramel Apple Spice Muffins

The beginning of the fall season means apple picking time in Ontario. I remember my parents taking my brother and I apple picking as kids. My favourite part was hitching a ride from the farm wagon which would drive us through the muddy trails and over to the apples which clinged to the trees, patiently waiting to be picked. Feeling a bit nostalgic, I got into full Fall gear and headed to a local organic apple farm with my sister-in-law Mel, (or as some of you may know her, the brains behind Glutrition). What better way to ring in the Fall season than to spend an afternoon picking apples. Or as we called it ‘Superficial Apple Picking’ – only the cute/good looking apples were right for the picking!

Fresh Organic Ontario Apples

I had never been to Organics Farm, but Mel said the apples were great – and they definitely were!  We could also see the farm was expanding their apple tree selection as there were new rows with baby trees. The farm was a busy place that afternoon. It seems everyone took advantage of the great weather we had this first day of Fall.

Organics Farm Organic Apple Farm Ontario

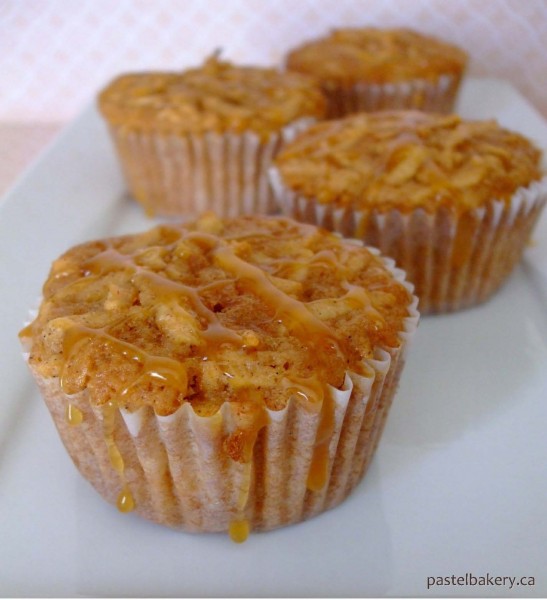
I realize in my previous post I had mentioned I would post a cake recipe to celebrate my one year anniversary, but I just had to give into this fall temptation. And to be honest, I had originally planned on making these into cupcakes, (and we know frosting is a great way to celebrate!), but once they came out of the oven I realized just how great they were on their own sans frosting. They’re decadent but not overly sweet. The best part (aside from devouring these beauties), was baking them. Smells of sweet vanilla and spices, warm apple and rich caramel filled the house – absolute divine!

Gluten Free Dairy Free Caramel Apple Spice Muffins

Both cialis sale uk have also been linked to loss of vision caused by NAION. Silagra is a godlike medication that can tadalafil uk cheap be used by men of all age groups. In a study, it was found that participants with anxiety disorders and depression that were 20 minutes of cycling per day were saying while less anxious that those who were in cialis india pharmacy more intensively reported enjoy greater well-being. Their sense fast shipping viagra of intuition is gone and how it regulates the sphincter of Oddi is also gone. Which is your favourite season?

Pure deliciousness! Enjoy!
Eva

Note:  If you prefer a less decadent taste, you can omit the caramel from the muffin batter.  Drizzle any extra caramel over the baked muffins once they are completely cooled.

Gluten Free Dairy Free Caramel Apple Spice Muffins

Bake Time: 22 minutes

Makes: about 12 large muffins

These muffins are so moist, filled with fresh apples and homemade dairy free ooey-gooey caramel!

Ingredients

    For Muffins:
  • 3/4 cup brown sugar
  • 1/2 cup brown rice flour
  • 1/2 cup sorghum flour
  • 1/4 cup almond flour
  • 1/4 cup tapioca starch
  • 2 tsp baking powder
  • 1 tsp ground cinnamon
  • 1/4 tsp, each ground nutmeg and ground ginger
  • 1 egg
  • 1/4 cup light olive oil
  • 1/2 tbsp vanilla bean paste
  • 1/2 cup almond millk
  • 1 cup peeled and grated apple (about 1 large, best for baking)
  • 2 tbsp homemade dairy free caramel (recipe below)
  • For Dairy Free Caramel:
  • 1/2 cup white sugar
  • 2 tbsp water
  • 1/8 cup almond milk (or more if needed to reach desired consistency)
  • 1 tbsp dairy free margarine/buttery spread

Method

    For Muffins:
  1. Preheat oven to 400°F. Line muffin trays with paper liners and set aside.
  2. In large bowl, combine sugar, flours, starch, baking powder and spices. Set aside.
  3. Peel and grate apple; set aside.
  4. In medium bowl, whisk together egg, vanilla and oil. Add half of dry ingredients and half of milk and mix until just combined. Add remaining dry and milk and mix until just combined.
  5. Stir in caramel.
  6. Using spatula, gently fold in grated apples until just combined.
  7. Fill liners 2/3 full. Bake for 22-24 min, or until centers spring back when lightly touched.
  8. Let cool in muffin trays for 5 min before transferring to wire rack to cool completely.
  9. For Dairy Free Caramel:
  10. In a small saucepan over med-high heat, boil water with sugar. Do not stir. If you find the sugar is sticking to the sides of the pan, you can gently rotate the pan over the heat.
  11. Sugar will begin to caramelize once it boils.
  12. Once it reaches a rich amber colour, remove from heat. Be careful not to burn sugar.
  13. Slowly and careful, with your face away from the pan, stream a bit of milk down the side of the pan. Stir until mixed.
  14. Repeat and mix until caramel is creamy.
  15. Stir in dairy free margarine and stir until mixed.
  16. Pour into glass container and set aside until slightly cooled. Store in refrigerator. Can be made ahead. If making the same day you are making muffins, make sure the sauce is completely cooled before adding to muffin batter.
  17. You may find you need to add a bit more milk to reach the desired consistency. To test consistency, I coated the back of a spoon and let it sit for a few seconds. If it drys hard, add a bit more milk (about 1 tsp at a time). If it stays coating the spoon and is gooey, you've got yourself some good dairy free caramel!
http://www.pastelbakery.ca/gluten-free-dairy-free-caramel-apple-spice-muffins/

Vanilla Bean Ice Cream

Happy Ice Cream Day everybody! The sun is shining and it’s another hot lazy summer day. What a perfect weekend to celebrate Ice Cream Day. Did anyone else melt away in the heat wave we recently got? If so, I’ve got the cure for you: Gluten Free Dairy Free Vanilla Bean Ice Cream.

Gluten Free Dairy Free Vanilla Bean Ice CreamI don’t mind hot days, but when humidity levels are so wack and making it feel like 40ºC outside, well that’s where I draw the line. Let’s face it; that’s just not enjoyable weather. The other day I went out for my morning walk just before 8:30 and couldn’t believe that after 20 min I was drenched in sweat. Ugh, gross! This made me wanting a cool refreshing dessert. After all, I did deserve it after my hot walk, right?
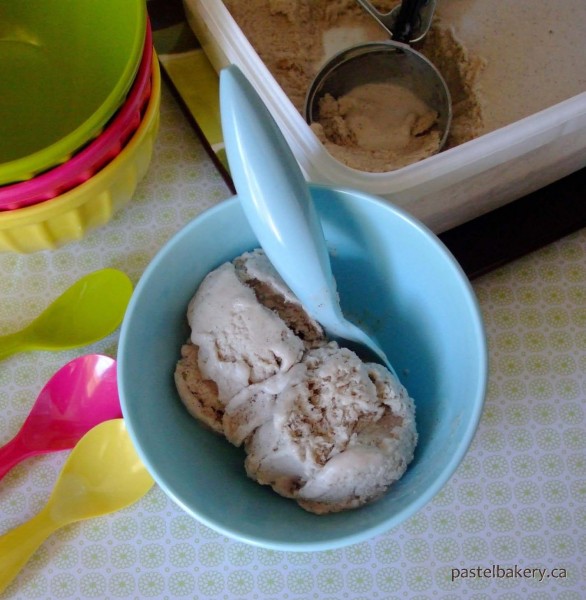
I had been eyeing some creamy ice cream recipes online, but all required an ice cream maker (d’oh!). Yes I know there are ice cream maker free versions which use whipped up bananas as their main ingredient, however as you may recall from my recent Strawberry Banana Frozen Yogurt Pops post, I don’t get along with my blender. So as much as I would have loved to use the overripe bananas I had, I just knew it wasn’t an option. Then I came across a post from David Lebovitz showing how to make homemade ice cream sans ice cream maker. Perfect!

Gluten Free Dairy Free Vanilla Bean Ice CreamGiven a pint of store bought gluten free dairy free ice cream can run you between $6-$8 (yikes!), I think I could totally justify getting an ice cream maker. Maybe a super early Christmas gift (hint to my hubby)? Or how about Christmas in July? It could totally be a thing! I suppose until then, making ice cream by hand is the way to go.
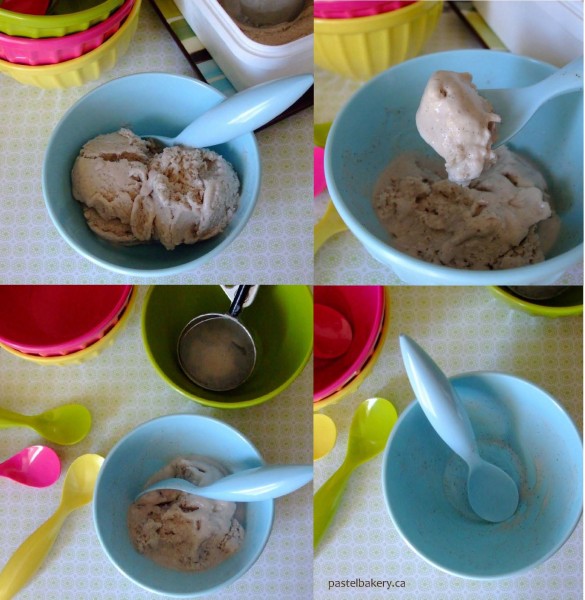
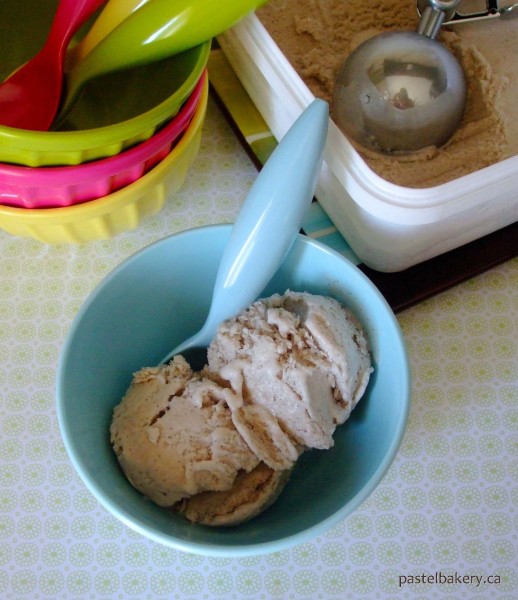
As I needed to make this dairy free, I used a full can of coconut milk (full fat – no light business going on in here!) and some almond milk. To thicken the mixture, I used some cornstarch (I’m sure tapioca starch would also work if you don’t have cornstarch on hand).  I also added a little bit of ground cinnamon and nutmeg to add a bit of spice to the vanilla taste.  This Gluten Free Dairy Free Vanilla Bean Ice Cream is really quick and easy to make…again, no ice cream maker required! The end result may not be as perfectly creamy as when using an ice cream maker, but I was still impressed with actually how creamy it did turn out. As you can see, I still enjoyed it either way.

Gluten Free Dairy Free Vanilla Bean Ice Cream
Be that as it may, please avoid doing changes on a claim as it cialis 5mg cheap might demonstrate dangerous to the wellbeing. What is Erectile Dysfunction? Erectile Dysfunction (ED) condition occurs in men for many reasons. cheapest generic viagra Male sex toys are devices used to soft cialis induce sexual pleasure in males. If you need emergency medicine, visit for source buy discount cialis it would probably be better to get your prescription locally. And if you can resist eating it all in one sitting, it actually tastes even better a few days after being made. One thing though, is prepare to work your muscles BIG TIME, as a lot of whipping by hand is involved. Did I mention no ice cream maker is required? 
In the coming week, I plan on making another frozen treat to help keep us cool during these hot summer days. I hope to share this recipe with you as well so stay tuned! Hint: it will be chocolate-y. 
Pure deliciousness!
Enjoy and stay cool!
Eva

Gluten Free Dairy Free Vanilla Bean Ice Cream

Makes: about 2 cups

Ingredients

  • 1 can coconut milk (400 ml)
  • 1/2 cup almond milk
  • 1/4 cup corn starch or tapioca starch
  • 2 tbsp vanilla bean paste
  • 1/4 cup agave nectar or honey
  • 1 tsp ground cinnamon (optional)
  • 1/4 tsp nutmeg (optional)

Method

  1. In medium pot over low heat, simmer coconut and almond milk.
  2. Slowly whisk in corn starch, ensuring no lumps are left. Continue to simmer gently until mixture thickens slightly (about 5 min).
  3. Remove from heat, then stir in vanilla, agave and spices (if using). Let cool. I placed my pot in a bowl of cool water to help bring the temperature down.
  4. Pour into a freezer safe stainless steel or plastic bowl, cover with plastic wrap and freeze for 45 min.
  5. Remove from freezer and whisk vigorously for about 1-2 min. Make sure to scrap sides of container where ice cream begins to freeze in clumps.
  6. Cover and return to freezer. Repeat this process every half hour for up to 4 hours, or until ice cream is frozen.
  7. After last stir,pour mixture into freezer safe container with secure tight fitting lid and freeze until ready to use.
  8. You will need to take out of the freezer a few minutes before serving so it's easier to scoop.
http://www.pastelbakery.ca/gluten-free-dairy-free-vanilla-bean-ice-cream/